


Sold out
Human Skeleton Model for Students: Parts & Sizes
Human skeleton model for students: parts, sizes & how to choose
Human skeleton model choices can feel confusing at first, especially when the same product category includes classroom-sized displays, compact desk tools, and detailed teaching aids for different learning levels. A good teaching aid helps students see how the human body’s framework is organized, how major bones connect, and how movement is supported without needing advanced medical language. This guide explains the main parts, sizes, materials, labelling, safety points, and buying checks that matter most for student learning.
Which human skeleton model is best for students?
The best human skeleton model for students is the one that matches the learning setting, available space, and level of detail needed. A beginner may need a clearly labelled, durable human skeleton with the skull, spine, ribs, pelvis, arms, and legs easy to identify. Older students may benefit from extra detail, such as movable joints, numbered bones, or removable parts.
For most classrooms, a full size or half size human skeleton model works well because students can compare it to real human body proportions. For individual study, a desk model may be easier to store and review. If the goal is to explain posture, curves of the back, or vertebrae, a separate spine model can also be useful.

A human skeleton supports visual learning
Students often understand anatomy better when they can see the structure in three dimensions. A flat diagram is useful, but an anatomy model shows depth, spacing, and connection points in a more natural way. Learners can walk around it, point to areas, and compare one bone group with another.
A human skeleton also helps teachers explain relationships. The ribs are not floating pieces on a page; they connect with the spine and protect the chest area. The pelvis is not just one shape; it forms a strong base that links the trunk to the lower limbs. This kind of visual connection makes the bones of the human skeleton easier to remember.
Human skeleton basics for beginners
A human skeleton is a teaching tool that represents the human body’s bony framework. Makers usually build it from plastic or resin and arrange it to show the skull, spine, rib cage, pelvis, arms, hands, legs, and feet. Some models are simple, while others include labels, color marks, movable joints, or removable sections.
Students do not need to learn every bone at once. A clear approach is to begin with the largest regions, then move toward smaller details. First identify the head, trunk, and limbs. Then learn the skull, vertebrae, ribs, pelvic bones, upper limb bones, and lower limb bones. This keeps the subject manageable and avoids turning anatomy into a long list of names.
How many bones are in the human skeleton?
People commonly describe the adult human skeleton as having 206 bones. This number is helpful for students, but it should be understood as a standard adult count, not a rule for every age or every version. Children have more separate bones because some bones join together as the body grows.
A human skeleton may not show every tiny bone with the same level of detail. For example, the small bones of the hands, feet, and inner ear may look simplified or grouped depending on the model’s purpose. For classroom learning, balance accuracy with clarity. One that clearly shows the main bone groups can be more useful than one that adds fine detail too early.
Human skeleton parts at a glance
A useful human skeleton should make the main regions easy to recognize. These regions give students a map before they study individual bone names. They also help teachers explain how the human body is arranged from head to toe.

Key areas to look for include:
- Skull: the bony structure of the head and face.
- Spine: the column of vertebrae running down the back.
- Ribs: curved bones that form the rib cage.
- Pelvis: the strong basin-shaped structure at the lower trunk.
- Limbs: the arms, hands, legs, and feet.
Once students know these broad regions, the smaller bones become easier to place. The model becomes less like a confusing object and more like a clear study map.
The skull shows the head and face
The skull is often the first part students notice on a human skeleton. It protects the brain and gives shape to the head and face. On a teaching model, the skull may show the eye sockets, nasal opening, jaw, cheekbones, and cranium.
Some human skeletons have a movable lower jaw. Others include a removable skull cap for closer inspection. For younger learners, the most important point is simple: the skull is not one plain round bone. It is a group of bones joined together, forming a strong protective structure and the foundation of the face.
The spine connects and supports the body
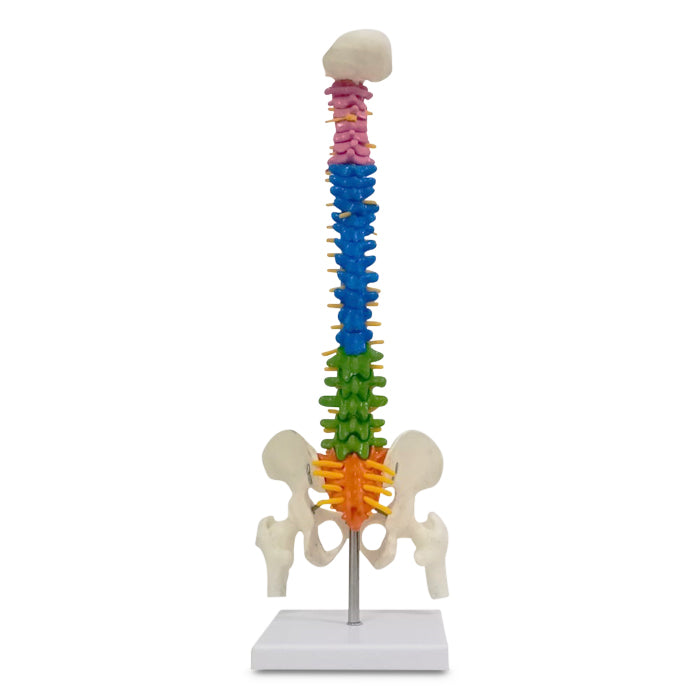
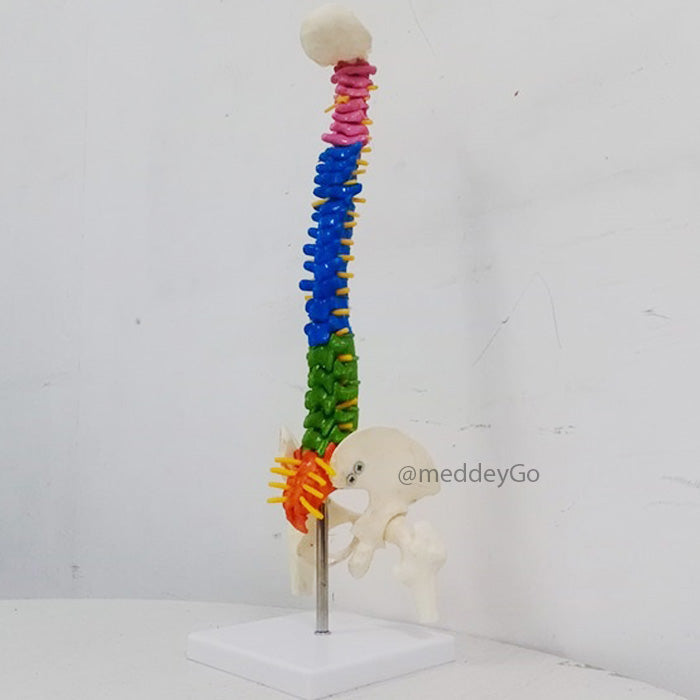
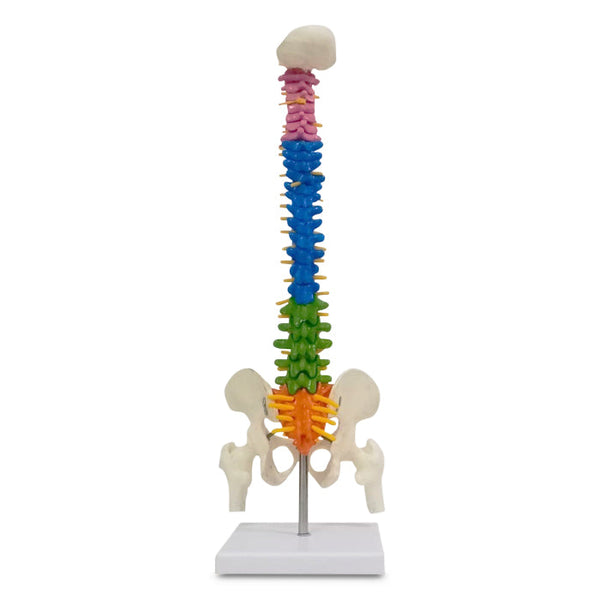
The spine is the central support column of the human skeleton. It runs from the base of the skull down to the pelvis and is made of small bones called vertebrae. On a human skeleton, the spine also shows natural curves, which help students understand that the back is not perfectly straight.
A separate spine model may offer more detail than a full human skeleton, especially when learning the cervical, thoracic, lumbar, sacral, and coccygeal regions. In a general classroom, however, a full model with a visible spine is usually enough to show how the skull, ribs, and pelvis connect. The spine is also useful for explaining posture in a purely educational way.

The ribs form the chest framework
The ribs are curved bones that wrap around the chest area. Together with the spine and breastbone, they form the rib cage. On a human skeleton, the ribs help students see the shape of the upper trunk and the space where important organs sit.
The rib cage is also a good example of structure and movement working together. It is strong, but not completely rigid. A teaching aid may not move like a real chest, yet it still helps students understand the protective shape and the way the ribs attach toward the back. Clear rib spacing is helpful when comparing simple models with more detailed medical models.
The pelvis is the body’s lower bridge
The pelvis is the large, basin-shaped part of the human skeleton at the lower trunk. It supports body weight when a person sits and helps connect the spine to the legs. On a human skeleton, it is one of the best areas for showing how the upper and lower body meet.
Students should notice that the pelvis is not just a single ring. It includes broad hip bones, the sacrum at the back, and openings that give it a distinctive shape. A clear pelvis is important for anatomy lessons because it helps learners understand balance, walking, and the connection between the trunk and lower limbs without needing complex explanation.
The limbs show movement and reach
The limbs include the upper limbs and lower limbs. The upper limbs are the arms, forearms, wrists, hands, and fingers. Lower limbs include the thighs, legs, ankles, feet, and toes. On a human skeleton, these areas show how the human body reaches, grips, stands, and walks.
Movable shoulder, elbow, hip, and knee joints make a teaching aid more useful for students. Even simple movement helps learners connect bone shapes with human body actions. Hands and feet can be challenging because they contain many small bones, so clear shaping and strong construction matter. If those parts are too fragile or poorly made, they may be hard to use in regular teaching.
Human skeleton sizes explained
Human skeletons come in several sizes, and each size has a different purpose. The right choice depends on how you will use it, who will use it, and where you will store it. Bigger is not always better, especially in small classrooms or home study spaces.

Common options include:
- Full size models: close to adult body height and easy to demonstrate from across a room.
- Half size models: smaller and easier to move while still showing the full human skeleton.
- Desk models: compact ones for personal study or small group review.
- Hanging models: designed to hang from a stand, hook, or display area.
A larger version usually supports group teaching. A smaller version usually supports storage, portability, and individual study.
What size human skeleton should I buy?
Buy the size that fits your learning purpose first and your storage space second. A full size human skeleton is best when a teacher needs to point out body regions to a group. A half size or desk model is better when students need something portable, affordable, and easy to handle.
If you are asking, “What size human skeleton should I buy?”, think about viewing distance. In a classroom, students at the back need to see the skull, ribs, pelvis, and limbs clearly. At a desk, fine labels may matter more than height. Also consider whether the human skeleton will stay in one room or move often. One that is too large for daily use may get less use.
Full size human skeleton features
Makers design a full size human skeleton to approximate adult proportions. People often use it in classrooms, training rooms, patient education spaces, and demonstration areas. Because it is large, it makes major bones and human body regions easier to identify from a distance.
The main benefit is visibility. A teacher can point to the skull, spine, ribs, pelvis, and limbs while the whole group follows along. Full size models may come with a stand and wheels, which can make movement easier. The tradeoff is space. Large versions need room for storage and may be more than a casual home learner needs.
Half size human skeleton features
A half size model shows the same general body layout in a smaller format. It is useful when space is limited but students still need to see the full human skeleton. Many half size models include the skull, spine, rib cage, pelvis, arms, and legs in a simplified but recognizable form.
This size can be a good middle ground. It is easier to store than a full size model, but more complete than a small desk display. For student use, check that the parts are not too crowded. If labels, bones, or joints crowd together, it may be compact but harder to study.
Hanging human skeleton features
A hanging human skeleton hangs freely instead of sitting on a floor stand or desk. It may hang from a hook, rail, or support frame depending on the design. This option can save floor space and keep it visible when not in active use.
Hanging models work best when the display location is secure and easy to reach. They are helpful in classrooms where wall or storage space is limited. However, students may not be able to rotate or handle it as freely. Before choosing one, check the hanging point, cord or hardware, and whether it can hang safely without swinging or falling.
Desk human skeleton features
A desk human skeleton is a compact version intended for close-up study. It can sit on a table, shelf, or student workstation. This type is useful for quick review, individual learning, small tutoring sessions, or spaces where a large one is not practical.
The main advantage is convenience. A desk model is easy to move and usually simple to store. The limitation is scale. Small bones may look simplified, and labels may be harder to read. If the model is for serious study, choose one with clean shaping, stable support, and enough detail to identify the main regions without guessing.
Human skeleton materials and durability
Makers build most educational human skeletons from plastic, resin, or similar molded materials. These materials are popular because they can show bone shapes clearly while staying light enough to move. Higher-quality versions usually feel sturdy, have smoother finishes, and hold their parts firmly.
Common material features include:
- Plastic or PVC: light, common, and practical for classrooms.
- Resin: a common choice for sharper detail or a heavier feel.
- Metal hardware: used in stands, hooks, screws, or joint supports.
- Elastic, nylon, or flexible connectors: used where parts need limited movement.
- Painted markings: used to show labels, muscle origins, or bone regions.
Durability depends on both material and construction. A good material can still fail if joints are weak or the stand is unstable.
Human skeleton labelling matters
Labelling turns a human skeleton from a display object into a study tool. Clear labels help students connect what they see with the correct anatomical names. This is especially helpful for learners who are new to anatomy and may confuse similar-looking bones.
Look for labels that are readable, correctly placed, and not so crowded that they hide the shape of the bone. Some use printed names, while others use numbers with a separate key. Numbered systems can be helpful on smaller ones because they reduce clutter. Color coding may also help, but it should support learning rather than distract from the bone shapes.
Human skeleton quality signs
Quality is not only about how impressive a model looks. A useful one should be stable, readable, and strong enough for repeated educational use. It should also represent the main bones in a way students can understand.

Check these signs before buying:
- Stable base or support: it should stand or hang securely.
- Clear bone shapes: major parts should be easy to identify.
- Firm joints: movable areas should not feel loose or flimsy.
- Readable labels: names or numbers should be clear at the expected viewing distance.
- Smooth finish: rough edges can make handling unpleasant.
- Appropriate detail: it should match the learner’s level.
A simple, well-made option is often better than a complicated one that is hard to handle.
Human skeleton safety points
A human skeleton is an educational object, so safety is mostly about handling, storage, and age-appropriate use. Check whether small parts could come loose, especially on compact ones with hands, feet, teeth, or removable pieces. If young students will use it, they may need adult supervision to prevent rough handling or accidental damage.
For safety concerns related to pain, injury, symptoms, or real anatomy, see a doctor or trained professional.
Also check the stand, hanging hardware, and wheels if included. A tall display should not tip easily. Secure a hanging model before students gather around it. A desk model should have a base that keeps it from falling during normal use.
Human skeleton details for student levels
Different students need different levels of detail. A beginner may only need to identify the skull, spine, ribs, pelvis, arms, and legs. Too many labels can overwhelm a new learner. For early lessons, simple visibility matters more than advanced terminology.
Intermediate students may need more detail in the vertebrae, hands, feet, and skull. Advanced students may benefit from numbered structures, removable skull sections, or muscle marking points. The best approach is to match the product to the lesson. One that is too simple may limit study later, but one that is too detailed may slow down beginners.
Human skeleton use in classrooms
In a classroom, a human skeleton works best when it is part of active teaching rather than decoration. Teachers can use it to introduce body regions, review vocabulary, and connect bones to movement. Students can take turns identifying parts or comparing it with diagrams.
Useful classroom activities include:
- Pointing to a bone region after hearing its name.
- Matching printed labels to the bones.
- Comparing a full human skeleton with a separate spine model.
- Tracing how the spine connects the skull and pelvis.
- Reviewing the difference between upper and lower limbs.
Short, repeated activities often work better than one long lecture. The model becomes familiar through use.
Human skeleton use for patient education
Human skeletons can also support patient education in a neutral, visual way. A simple teaching aid helps explain where a bone or joint sits without using complicated language. For example, pointing to the pelvis or spine can make a conversation easier to follow.
In this setting, clarity and professionalism matter. The model should be clean, stable, and easy to position. Labels can help, but too many details may distract from the basic explanation. The goal is not to replace personal guidance or make claims. It is simply to provide a visual reference that helps people understand general human body structure.
Medical models compared with anatomy model options
Medical models is a broad category that can include human skeletons, organs, joints, muscles, charts, and body systems. An anatomy model may show the whole human skeleton, one part of the body, or a specific structure. A human skeleton model is one type of anatomy model focused on bones.

The choice depends on the lesson. A full human skeleton helps explain body layout. For head and face lessons, a skull model helps. A spine model supports vertebrae and back structure lessons. A joint model may be better for studying a shoulder, knee, or hip in detail. For general student learning, start with the whole human skeleton before adding specialized types.
Human skeleton labels to look for
When buying, look beyond whether a product is labelled and check how the labelling is presented. Labels should be useful during real study, not just listed in a product description. If labels are too small, poorly placed, or hard to match with the bone, they may not help students much.
Helpful labelling features include:
- Names of major bones and regions.
- Numbered keys for smaller structures.
- Clear left and right side indicators where useful.
- Color marks that explain regions without hiding detail.
- Durable printing that will not rub away quickly.
- A simple reference sheet or guide if it uses numbers.
Good labelling reduces guessing and supports independent review.
Human skeleton movement and removable parts
Movable parts can make a version more engaging. A jaw that opens, arms that rotate, or knees that bend can help students connect bone structure with basic movement. However, every moving part also adds a point that can wear out or break.
Removable parts are useful when they have a clear educational purpose. A removable skull cap, for example, may help with head structure lessons. Removable limbs can make storage easier, but they should attach securely. Before choosing one with many features, ask whether you will use those features often. If not, a simpler one may last longer and be easier to manage.
Human skeleton storage and display
Storage affects how often people use a human skeleton. If it is hard to access, teachers and students may leave it untouched. A full size model should have a safe corner, cabinet area, or covered storage space. A desk model should fit on a shelf without being crushed or tipped.
Display also matters. A visible human skeleton can encourage curiosity, but it should not block walkways or sit where people can knock it over. If it has a cover, use it when the room is dusty. If it has wheels, lock them when it is in place. Good storage protects both the model and the learning environment.
How do you clean a human skeleton?
Clean a human skeleton gently with a soft, dry or slightly damp cloth, following any care instructions that came with it. Dust is usually the main issue, especially around the ribs, spine, hands, and feet. Avoid soaking it or using harsh products unless the manufacturer’s care information clearly allows it.

For routine cleaning, start at the top and work downward. Support delicate parts while wiping so you do not pull on joints or connectors. If it has labels, test any damp cleaning on a small hidden area first. Dry the surface before storage. Regular light cleaning is better than waiting until dust builds up in small spaces.
Human skeleton buying checklist
A clear checklist can prevent buying a human skeleton that looks good online but does not fit the learning need. Before choosing, think about who will use it, how often, and where you will store it. A classroom model, a home study model, and a patient education model may all need different features.
Use this checklist:
- Purpose: general study, classroom teaching, or demonstration.
- Size: full size, half size, hanging, or desk.
- Detail level: simple regions or labelled bone names.
- Durability: strong joints, stable base, and solid connectors.
- Labelling: readable names, numbers, or a helpful key.
- Safety: no unstable stand, sharp edges, or loose small parts.
- Storage: enough room when it is not in use.
- Cleaning: surfaces that you can dust easily.
The best choice is the one students will actually use.
Human skeleton mistakes to avoid
One common mistake is buying the most detailed option without considering the learner. Detail is helpful only when students are ready for it. For beginners, crowded labels and tiny structures can make study harder instead of easier.
Another mistake is ignoring the stand or base. A human skeleton that tips, leans, or swings too much can interrupt lessons and may become frustrating to handle. Buyers also sometimes overlook label readability. A product can have labels and still be difficult to use if the text is too small. Finally, avoid choosing by size alone. A compact one with clear parts may teach better than a large one with weak construction.
Human skeleton comparison by learning need
Different learning goals call for different model types. A short comparison can make the decision easier.
| Learning need | Helpful model type | Why it helps |
|---|---|---|
| Group classroom teaching | Full size model | Large enough for students to see from a distance |
| Small classroom or tutoring | Half size model | Shows the full human skeleton while saving space |
| Personal review | Desk model | Easy to keep nearby for short study sessions |
| Wall or room display | Hanging model | Saves floor space and keeps the human skeleton visible |
| Back structure lessons | Spine model | Focuses attention on vertebrae and spinal curves |
This comparison is only a starting point. The final choice should reflect the student’s level and the setting.
Human skeleton learning tips
A teaching aid becomes more useful when students interact with it in a structured way. Instead of trying to memorize every bone at once, move from large areas to smaller details. This builds confidence and helps the human skeleton feel organized.
Try this simple study order:
- Identify the skull, spine, ribs, pelvis, and limbs.
- Divide the limbs into upper and lower sections.
- Learn the largest bones first.
- Add hands, feet, and smaller bones later.
- Use labels or a key for review.
- Compare it with a diagram or textbook.
This method works because it gives each new detail a place. Students are not memorizing isolated words; they are building a map.
Human skeleton features worth prioritizing
If budget, storage, or space requires compromise, prioritize the features that affect learning every day. Clear shape, stable support, readable labelling, and suitable size usually matter more than decorative extras. A product should invite repeated use, not require constant repair or careful handling.
For many students, the best features are simple: the skull should be easy to identify, the spine should be clear, the rib cage should be open enough to see, the pelvis should have a recognizable shape, and the limbs should attach firmly. If those basics are strong, it can support many lessons. Extra features are useful only when they serve a specific teaching goal.
Human skeleton final takeaway
A human skeleton model is most valuable when it makes anatomy easier to see, explain, and remember. Students need a clear view of the skull, spine, ribs, pelvis, and limbs before they move into smaller bone names. Teachers and learners should choose one based on size, quality, labelling, materials, safety, and everyday usability.
Full size models are strong for group teaching, half size models save space, hanging models support display, and desk models suit personal study. Good materials and clear labels help it last and stay useful. When the choice fits the lesson, the space, and the student’s level, the human skeleton becomes a practical learning companion rather than a confusing collection of parts.
Explore Medical Collections
All Categories
Abdominal & Maternity Support

Accessories

Accu-Chek Instant Strips: Use, Compatibility, Price & Blood Sugar Testing Guide
Accu-Chek Instant Strips: Uses, Features & Complete Guide

accupuncture

Acupuncture Needles & Supplies

Advanced Physiotherapy Machines & Lumbar Physiotherapy

Airways

Ambulance

Anatomy Models
Anesthesia Machine

Anesthesia Products
Ankle Support for Home Use: Braces, Sleeves & Walker Boots
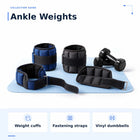
Ankle Weights & Exercise Weights for Home & Rehab

Anti-Bedsore Air Mattresses