


Empty collection
This collection does not contain any products.
Dissection Kit for Students: Instruments & Uses
Dissection kit for Students: Instruments, Uses & How to Choose
Dissection kit for students is a practical learning set used in anatomy and biology classes to help students handle specimens with care, observe structures clearly, and build confidence with basic instruments. The right dissection kit should be easy to understand, safe to carry, simple to clean, and suitable for the student’s course level. This guide explains common instruments, their uses, dissection kit sizes, stainless steel quality, safe blade handling, and care tips in clear student-friendly language.
What is in a dissection kit?
A dissection kit usually contains the basic tools students need for practical study. The exact items can vary by dissection kit size, but most anatomy and biology practical dissection kits include cutting, holding, pointing, and separating tools packed inside a dissection box.

Common items include:
- Scalpel handle and blades for careful cutting during practical work
- Toothed forceps for holding firmer tissue or material
- Plain forceps for holding delicate parts with less marking
- Dissecting scissors for cutting and trimming
- Probe and needle for pointing, lifting, and separating small parts
- Dissecting forceps for gripping and moving small sections
- Extra small tools depending on the dissection kit size and course need
- Dissection box to keep the instruments organized and protected
For students, the best dissection kit is not always the one with the most items. It is the one that includes the tools your practical class actually requires and keeps them in a neat, easy-to-use layout.
The dissection kit as a learning companion
A dissection kit is more than a box of instruments. It helps students move from reading diagrams to observing real structures in practical sessions. When used correctly, each tool supports careful study rather than rough cutting or guessing.
Students often feel unsure at first because the instruments look sharp or unfamiliar. That is normal. With simple guidance, the tools become easier to recognize: one tool cuts, one holds, one points, and another separates. This basic understanding makes practical work calmer and more accurate.
A good dissection kit for students also teaches responsibility. You learn how to carry tools safely, clean them after use, and return each item to its proper place. These habits matter because sharp and fine instruments last longer when handled with patience.
Why students need the right instruments
The right instruments make practical work cleaner, safer, and easier to follow. If a tool is too blunt, too loose, or uncomfortable to hold, students may press too hard or lose control. That can make observation difficult and may damage the specimen.
For biology and anatomy study, students need instruments that match classroom-level tasks. A scalpel handle should hold the blade firmly. Forceps should grip without slipping. Scissors should open and close smoothly. A probe and needle should be straight enough for careful pointing.
Choosing suitable medical student instruments for learning does not mean choosing advanced or complicated tools. It means choosing simple, reliable instruments that help students practice basic skills in a steady way. A well-arranged dissection box also saves time because students can find each tool quickly during a practical session.
Main instruments and their everyday uses
Each instrument in a dissection kit has a clear purpose. Learning the purpose of each tool helps students avoid using one instrument for every task. This makes practical work more controlled and less stressful.

A scalpel handle is used with a blade for fine cutting. Dissecting scissors are used when a longer or more controlled cut is needed. Dissecting forceps hold small parts so the student can observe or separate them.
A probe and needle are not mainly cutting tools. They are used to point, lift, trace, or gently separate small structures. This is useful when a student needs to show a part without cutting it. Once you understand these roles, the whole dissection kit becomes easier to use.
Scalpel handle and blades explained simply
The scalpel handle is the part you hold, while the blade is the sharp removable part fixed to it. Students use this combination for careful cutting in practical study. The handle gives control, and the blade does the cutting.
A good handle should feel steady in the hand. It should not feel loose, slippery, or rough. The blade should fit securely so it does not move during use. Students should never try to force a blade onto the handle if it does not fit properly.
Blades need extra care because they are sharp. Always handle them by the safe edge or with proper guidance from the class instructor. Do not leave a blade uncovered on a table, and do not pass it casually to another student. Safe blade habits should begin from the first practical session.
Safe blade handling for students
Blade safety is one of the most important parts of using a dissection kit. A sharp blade should always be treated with attention, even when it looks small. Rushing, joking, or working with wet hands can increase the chance of a mistake.
Follow these simple rules:
- Fix the blade carefully on the scalpel handle before starting.
- Keep fingers away from the cutting edge at all times.
- Cut away from your body and away from other students.
- Use light pressure instead of forcing the blade.
- Place the tool down safely when not in use.
- Remove or replace blades only with supervision if your class requires it.
- Store blades safely after the practical session.
Never carry an open blade in your pocket or bag. Keep it inside the dissection box only when it is safe and properly covered.

What is the use of a dissecting forceps?
Dissecting forceps are used to hold, lift, pull aside, or move small parts during practical study. They help students grip material without using fingers, which gives better control and keeps the observation area clearer.
There are two common types: toothed and plain forceps. Toothed forceps have small gripping points at the end. They are useful when a firmer hold is needed. Plain forceps have smoother tips and are better when students need gentler handling.
This answers the common student question, “What is the use of a dissecting forceps?” In simple words, it works like a careful holding tool. It helps you steady the material while another instrument, such as scissors or a probe, is used. Good forceps should close evenly and should not bend easily during normal student use.
Dissecting scissors and when to use them
Dissecting scissors are used for cutting, trimming, and opening sections during practical work. They are different from ordinary paper scissors because they are made for controlled study tasks and fine movement. Students should use them only for the purpose given by the class instructor.
Scissors are helpful when a scalpel blade would be too sharp or too direct for a task. They can offer a steadier cut in some areas because both blades move together. However, they still need care because the tips can be pointed and the edges can be sharp.
Before using scissors, check whether they open and close smoothly. If they feel stuck, dirty, or loose, clean them or ask for guidance. Do not twist scissors while cutting, because this can damage the joint. After use, wipe and dry them well before storing them in the dissection box.
Probe and needle for careful observation
The probe and needle are useful for pointing, tracing, lifting, and separating. They help students study small structures without always cutting them. This is especially useful when the aim is to identify parts clearly and understand their position.
A probe usually has a smoother end, while a needle has a finer pointed end. Students can use them to gently move material aside, follow a line, or show a part to a classmate. These tools are simple, but they can make observation much easier.
Do not use a probe and needle as a lever for heavy pulling. They are not meant for forceful bending or prying. If the point becomes bent, it may not work accurately. Clean and dry these tools after every practical session because their tips and narrow areas can hold moisture.
Is a stainless steel dissection kit better?
A stainless steel dissection kit is usually preferred for students because stainless steel is strong, easy to clean, and more resistant to rust than ordinary metal. This does not mean it can never rust, but it handles regular practical use better when cleaned and dried properly.
In simple terms, stainless steel quality matters because students use these instruments again and again. A better surface is smoother, less likely to stain quickly, and easier to wipe after use. Tools made with poor-quality metal may become rough, weak, or rusty sooner if not cared for.
For students, the main benefit is simple: stainless steel instruments are easier to maintain. They can stay useful for a long time when handled correctly. Still, care is important. Even stainless steel should not be left wet, dirty, or mixed with harsh chemicals for long periods.
Understanding stainless steel quality in simple words
Stainless steel quality can sound technical, but students only need to understand the basics. Good stainless steel instruments should feel firm, have a smooth finish, and not bend easily during normal practical use. The surface should be easy to wipe clean.
The word “stainless” does not mean “no care needed.” It means the metal is made to resist staining and rust better than many basic metals. If water, salts, or dirt stay on the tool for too long, rust spots can still appear.
When checking a dissection kit, look at the finish. Avoid tools that look rough, uneven, or poorly joined. Scissors should move smoothly, forceps should meet evenly at the tips, and the scalpel handle should feel stable. These simple checks help students choose instruments that are easier to use and care for.
Anatomy and biology practical kit contents
Anatomy and biology practical kits are designed for student learning. They usually include the instruments needed for observing, holding, cutting, separating, and pointing during class work. A clear dissection kit layout helps students know which tool to use and when.
A student practical dissection kit commonly includes:
- Scalpel handle and blades for controlled cutting
- Toothed forceps for a stronger grip
- Plain forceps for gentler holding
- Dissecting scissors for cutting and trimming
- Probe for pointing and tracing
- Needle for fine pointing and separation
- Dissecting forceps for lifting or holding small parts
- Dissection box for safe storage and carrying
Some dissection kits may include extra tools based on the course level. However, the items above form the core of many student practical dissection kits. If you are buying for class, check your practical list first so the dissection kit matches what your teacher expects.
Available dissection kit sizes for students
Dissection kits are often available in different sizes so students can choose according to their course and practical needs. A smaller dissection kit may include only the most basic items, while a larger dissection kit may include extra forceps, scissors, or supporting tools.

Common student-friendly options include:
- Basic student kit: suitable for early biology practical work and simple observation tasks.
- Standard student kit: useful for regular anatomy or zoology practical sessions.
- Expanded student kit: helpful for students who need more instrument options for repeated practice.
- Compact travel-friendly kit: easy to carry in a bag when only selected tools are needed.
A larger dissection kit is not automatically better. If many tools are never used, they may only make the box crowded. The right size depends on your syllabus, your practical list, and how often you use the instruments.
Which dissection kit is best for MBBS students?
The best dissection kit for MBBS students is one that includes all required basic instruments, has sturdy stainless steel tools, and comes in a strong dissection box. It should be complete enough for practical study but simple enough to keep organized.
Students in demanding courses should look for a dissection kit with a good scalpel handle, sharp compatible blades, toothed and plain forceps, dissecting scissors, and a probe and needle. These instruments cover the main actions students need: cutting, holding, pointing, lifting, and separating.
If you are unsure, compare the dissection kit contents with your course list. Also check comfort. The tools should not feel too heavy, too slippery, or too weak. A neat box with fixed spaces for instruments can make practical sessions smoother because every item has its place.
Choosing a dissection box that stays organized
A dissection box protects instruments and keeps them easy to find. Students often carry their dissection kits between rooms, bags, and study spaces, so the box should close properly and keep tools from moving around too much.
A good dissection box should have enough space for each instrument. If tools are pressed together tightly, blades and tips may become damaged. If the box is too loose, instruments may slide and scratch each other.
Look for a box that is simple to open, close, and clean. It should not have sharp corners inside where dirt can collect. A tidy box also helps with safety because students can see whether any tool is missing before and after practical work. This habit reduces confusion and keeps the dissection kit ready for the next session.
Dissection kit and suture kit: know the difference
A dissection kit and a suture kit are not the same, even though both may contain small metal instruments. The dissection kit is mainly for student anatomy and biology practical study, where the focus is observation, cutting, holding, and separating. A suture kit is used for learning knotting and closing techniques in controlled practice settings.

Students should not mix the purpose of the two kits. If your class asks for a dissection kit, make sure it includes tools such as a scalpel handle, blades, forceps, scissors, probe, and needle. If a separate suture kit is required for a different learning activity, follow the exact list given by your instructor.
Keeping kits separate also helps with organization. Tools stay cleaner, easier to identify, and less likely to be misplaced. Use each dissection kit only for the practical work it is meant for.
How do you clean dissection instruments?
Clean dissection instruments by wiping off visible material, washing them gently with mild soap and water, drying them fully, and storing them in the dissection box only after they are dry. This simple routine helps keep the instruments ready for the next practical session.
A student-friendly cleaning routine is:
- Remove loose material with a soft cloth or tissue.
- Wash gently using mild soap and clean water.
- Clean joints and tips carefully, especially scissors and forceps.
- Rinse well so no soap remains.
- Dry immediately with a clean dry cloth.
- Keep instruments open briefly if moisture is trapped near joints.
- Store only when fully dry inside the box.
Do not leave instruments soaking for a long time. Do not store wet tools in a closed box. Moisture is one of the easiest ways for rust spots to appear.
Rust prevention and daily care
Rust prevention is mostly about keeping instruments clean, dry, and properly stored. Even stainless steel can develop rust marks if it stays wet or dirty. Simple care after every practical session can make a big difference.
Use these habits:
- Dry each tool before placing it in the dissection box.
- Keep blades separate or safely covered.
- Do not leave tools in damp bags.
- Avoid strong cleaning liquids unless your class instructor allows them.
- Check joints, tips, and edges for moisture.
- Wipe fingerprints from metal surfaces before long storage.
- Keep the box in a dry place.
If you notice a small rust mark, clean it early with guidance instead of ignoring it. Rust can spread when tools are stored without care. Regular checking also helps you notice loose scissors, bent forceps, or a dull blade before practical work begins.
Student safety habits during practical work
Safety starts before the first cut. Arrange your dissection kit neatly, keep only the needed tools on the table, and return unused items to the box. A crowded work area makes mistakes more likely.
During practical work, move slowly and keep your eyes on the tool you are using. Do not point sharp instruments toward another student. If you need to pass a tool, place it down safely so the other person can pick it up from the handle side.
Avoid using fingers where forceps can do the job. If a blade, needle, or scissor tip is not being used, keep it away from the edge of the table. At the end of the session, count the tools, clean them, dry them, and close the box properly. Good safety habits are built by repeating simple steps every time.
Comfort and control matter more than quantity
A dissection kit with many instruments may look impressive, but students benefit more from tools that feel comfortable and work properly. If a forceps does not grip well or scissors do not cut smoothly, extra items in the box will not help much.
Before choosing a dissection kit, think about how the instruments feel in hand. A scalpel handle should be easy to control. Forceps should not require too much pressure to close. Scissors should move without sticking. A probe and needle should feel balanced, not flimsy.
Control matters because student practical work often requires small, careful movements. A simple dissection kit with dependable tools can be better than a crowded dissection kit with weak or poorly finished items. Choose usefulness over appearance.
Matching the dissection kit to your course level
Different students need different dissection kit sizes and contents. A beginner in biology may need a basic dissection kit with essential tools. A student in a longer anatomy course may need a fuller set with extra forceps, scissors, and blades.
Before buying, check the list given by your teacher or department. If the list mentions specific tools, make sure the dissection kit includes them. Do not assume every box has the same contents. Two dissection kits can look similar from the outside but contain different items inside.
Also consider how often you will use the dissection kit. For occasional practical work, a basic or standard dissection kit may be enough. For repeated sessions, stronger stainless steel instruments and a better-organized dissection box may be more useful. Choose based on actual study needs, not guesswork.
Simple checklist before buying
A quick checklist can help students choose with confidence. Use it to compare dissection kits without getting confused by long product descriptions or extra items you may not need.
Check for:
- A complete set of required tools for your class
- Scalpel handle and compatible blades
- Toothed and plain forceps
- Dissecting scissors that open and close smoothly
- Probe and needle with straight tips
- Stainless steel instruments with a smooth finish
- A strong dissection box with proper spaces
- A size that suits your course level
- Tools that are easy to clean and dry
- Safe storage for sharp items
Also check whether the dissection kit is too basic or too crowded. A good student dissection kit should feel practical, not confusing. If your course list is available, keep it beside you while comparing options.
Common mistakes students should avoid
Many students make the same mistakes when they first start using a dissection kit. These mistakes are easy to avoid once you know what to watch for. The goal is to protect both the instruments and your practical work.
Avoid these habits:
- Using scissors to cut paper or random materials
- Leaving wet instruments inside the box
- Touching blade edges with fingers
- Mixing used and cleaned tools together
- Forcing a blade onto the wrong handle
- Bending a probe or needle to pull hard material
- Storing loose blades without safe covering
- Forgetting to count tools after class
Small mistakes can shorten the life of the dissection kit. They can also make the next session harder because tools may be dull, rusty, bent, or missing. Careful use from the beginning saves trouble later.
Final takeaway for students
A good dissection kit for students should be simple, complete, safe, and easy to maintain. Look for the instruments your class requires, including a scalpel handle and blades, toothed and plain forceps, dissecting scissors, and a probe and needle. Choose a dissection kit size that fits your course instead of choosing only by the number of tools.
Stainless steel instruments are a practical choice because they are strong and easier to clean, but they still need regular care. Clean and dry every tool after use, store the dissection kit in a dry place, and handle blades with full attention. When students build these habits early, the dissection kit becomes a reliable part of practical learning rather than something difficult or confusing.
Explore Medical Collections
All Categories
Abdominal & Maternity Support

Accessories

Accu-Chek Instant Strips: Use, Compatibility, Price & Blood Sugar Testing Guide
Accu-Chek Instant Strips: Uses, Features & Complete Guide

accupuncture

Acupuncture Needles & Supplies

Advanced Physiotherapy Machines & Lumbar Physiotherapy

Airways

Ambulance

Anatomy Models
Anesthesia Machine

Anesthesia Products
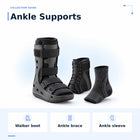
Ankle Support for Home Use: Braces, Sleeves & Walker Boots
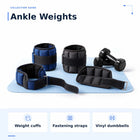
Ankle Weights & Exercise Weights for Home & Rehab

Anti-Bedsore Air Mattresses