


Featured ChoiceSave 64%

Save 73%


Save 44%


Save 14%

Save 24%

ECG leads: types, placement and electrode guide
ECG leads help a doctor view the heart’s electrical activity from different angles. For Indian families buying ecg accessories or arranging home care, correct electrocardiogram lead placement matters. It affects the tracing quality, comfort, and the value of the report. Medical use should always be guided by a doctor or trained professional.
What are ECG leads?
ECG leads are views of the heart’s electrical activity. An electrocardiogram, or ecg, records small electrical signals made during each heartbeat. Electrodes sit on the skin and collect these signals.

A lead is not always the same as a wire. In ecg language, a lead means a viewing angle. A lead wire is the cable that carries the signal from an electrode to the ecg machine.

A standard 12-lead ecg uses ten electrodes. These create twelve views, called leads. Standard references describe six limb leads and six chest leads in a 12-lead ecg.
For a family, think of each lead as a camera angle. One view may look at the lower heart area. Another may look at the front or side area. The doctor reads all views together.
Why the term can confuse families
Many people hear “lead” and think only of a cable. That is normal. ECG staff may also say “lead” when they mean an electrode position.
This makes home use confusing. A family may ask for “ecg leads” but may need lead wires, electrodes, or both. The right choice depends on the ecg machine and care setting.
When shopping, check the machine model and connector type. Also check whether you need disposable adhesive electrodes. If unsure, ask the care provider before ordering.
The simple family explanation
The ecg machine does not “treat” the heart. It records signals for review. The doctor uses the tracing with symptoms, history, and examination.
The family’s role is usually support. You can help keep the person calm and still. You can also ensure privacy, good lighting, and clean skin.
Placement should not become a guessing task. Small position changes can alter the tracing. That is why trained placement matters.
Why correct ecg leads placement matters
Correct ecg leads placement helps the machine record clean and useful heart signals. Wrong placement can create noise, change wave shapes, or confuse interpretation. It may also lead to repeat tests, stress, and delay.
In hospitals, clinics, ambulances, and home visits, staff follow standard points on the chest and limbs. These points are not random. They match accepted ecg leads.
The American Heart Association and related groups describe the standard 12-lead ecg as limb leads plus chest leads. They also explain that the system creates more leads than the number of electrodes used.
For families in India, this becomes important during home collection visits. A trained technician should place the electrodes. Family members can assist with comfort, but not replace training.
What can go wrong if ECG electrodes are misplaced?
Misplaced ecg electrodes can change the ecg pattern. This may make the tracing harder to interpret. It can also mimic or hide important findings.

A chest electrode placed too high, too low, or too far outward may show a different view. Limb electrode reversal can also change the tracing. A trained person checks labels before recording.
Skin contact problems create another issue. Loose electrodes can cause baseline movement. Sweat, oil, hair, or lotion can weaken the adhesive contact.
Common signs of poor placement or contact
Families do not need to read ecg waves. Still, you may notice practical problems. These signs mean the technician may need to adjust things.
-
The ecg machine shows repeated error messages.
-
A wire keeps falling off the body.
-
The paper or screen shows a wandering line.
-
The person moves due to discomfort.
-
The technician repeats the recording.
-
The electrode sticker does not hold.
-
The wire labels look crossed or confused.
If this happens, stay calm. Let the trained person correct it. Do not move electrodes yourself during recording.
Why a trained person should place electrodes
A trained person knows body landmarks. These include the sternum, ribs, collarbone line, and armpit lines. The sternum is the breastbone.
They also know when placement needs modification. Dressings, wounds, pain, tremors, or body shape may affect placement. Any change should be handled and recorded properly.
They protect privacy and dignity. This matters in Indian homes with elders, women, and shared rooms. A respectful setup helps the person feel safe.
ECG lead types at a glance
Different ecg setups serve different needs. A 12-lead ecg gives a full standard recording. A 3-lead or 5-lead ecg often supports monitoring.

A doctor decides which setup suits the situation. Families should not choose based only on price or convenience. The clinical question matters first.
What is the difference between 3-lead 5-lead and 12-lead ECG?
A 3-lead ecg usually monitors heart rate and rhythm with fewer electrodes. A 5-lead ecg gives more monitoring leads. A 12-lead ecg gives a standard diagnostic tracing with twelve leads.
A 3-lead setup may appear in basic monitors. It can help show rhythm during observation. It does not replace a full 12-lead ecg when a doctor asks for one.
A 5-lead setup adds another limb or chest view. It helps in many monitoring settings. It still differs from a full standard 12-lead recording.
A 12-lead ecg uses ten electrodes. It records six limb leads and six chest leads. This is common in clinics, hospitals, and diagnostic visits.
|
ECG setup |
Usual use |
Electrode count |
Family takeaway |
|---|---|---|---|
|
3-lead ecg |
Basic rhythm monitoring |
3 electrodes |
Not a full 12-lead test |
|
5-lead ecg |
Wider monitoring |
5 electrodes |
Often used during observation |
|
12-lead ecg |
Standard ecg report |
10 electrodes |
Needs careful placement |
How many leads are there in a standard ECG?
A standard ecg usually means a 12-lead ecg. It gives twelve views of the heart. These views include limb leads and chest leads.
The twelve leads are named I, II, III, aVR, aVL, aVF, and V1 to V6. The chest leads are also called precordial leads. Precordial means placed on the front of the chest.
Families may hear “12 leads” and expect twelve stickers. That is not how the standard system works. It uses ten electrodes to create twelve leads.
Why are there ten electrodes for twelve ECG leads?
There are ten electrodes because some leads are calculated from electrode pairs. Four electrodes go on the limbs. Six electrodes go on the chest.

The ecg machine uses signals between electrodes. It then creates different leads. This is why twelve leads do not need twelve stickers.
This also explains why every electrode matters. One poor contact can affect more than one view. Good placement supports the whole recording.
Electrode placement and lead position basics
ECG placement follows clear body points. The technician looks for landmarks, not just general areas. A “near enough” approach can reduce tracing quality.
Electrocardiogram lead placement includes limb electrodes and chest electrodes. Limb electrodes help create frontal leads. Chest electrodes help create front and side chest leads.
Standard sources describe ten electrodes for a conventional 12-lead ecg. The six chest electrodes are V1 to V6.
What is the difference between an ECG lead and an electrode?
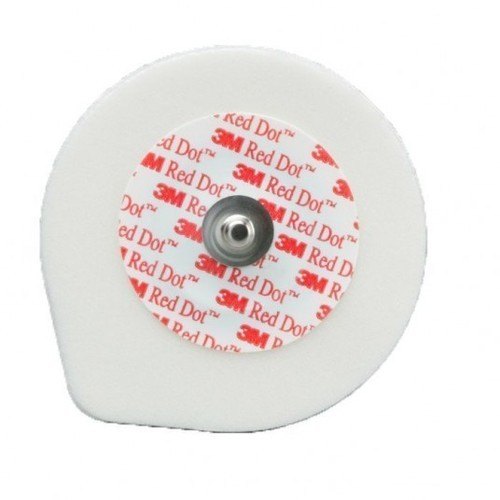
An electrode is the sticky pad or sensor placed on the skin. An ecg lead is the electrical view made from electrode signals. A lead wire is the cable joining the electrode to the machine.
This difference matters when buying accessories. You may need electrodes, lead wires, or an ecg cable. These are not always interchangeable.
Use the machine manual or clinician guidance. Many devices need specific connectors. Do not force a cable into a machine.
|
Word |
Plain meaning |
Family example |
|---|---|---|
|
Electrode |
Sticker or sensor on skin |
Disposable chest sticker |
|
Lead wire |
Cable from sticker to device |
Wire marked RA or V1 |
|
ECG lead |
Heart view on tracing |
Lead II or V4 on report |
|
ECG cable |
Main cable set |
Connector bundle for the machine |
ECG lead location needs body landmarks
The correct ecg lead location depends on chest and limb landmarks. The technician may feel ribs gently to find spaces. This is normal clinical practice.
The space between ribs is called an intercostal space. The fourth intercostal space means the gap between the fourth and fifth ribs. This helps place V1 and V2.
The midclavicular line is an imaginary line from the middle of the collarbone. The axillary lines relate to the armpit area. These terms guide V4, V5, and V6.
ECG lead position changes with body shape
People have different body shapes. Elders, children, and people with larger bodies may need careful landmark checking. Clothing and posture also affect access.
A trained person adapts respectfully. They should not guess based only on appearance. They should explain what they are doing.
Families can support privacy. Offer a separate room when possible. Provide a shawl or sheet after electrode placement.
Limb electrode guide for families
Limb electrodes form the basic frontal leads of the heart. They are usually labelled RA, LA, RL, and LL. These stand for right arm, left arm, right leg, and left leg.
The limb wires help create leads I, II, III, aVR, aVL, and aVF. These leads view the heart’s activity from different directions. AHA guidance describes these as standard limb and augmented limb leads.
Where do the limb electrodes go on the body?
The limb electrodes go on the right arm, left arm, right leg, and left leg areas. In many standard recordings, they are placed on the limbs. In some settings, trained staff may use torso positions.
Families should not shift them for comfort without asking. A change from limb to torso placement may affect the tracing. If modified placement is used, staff should document it.
Here is the simple guide. It helps families understand the labels during setup.
|
Label |
Full name |
Usual body side |
Simple role |
|---|---|---|---|
|
RA |
Right arm |
Right upper limb area |
Helps compare right and left arm signals |
|
LA |
Left arm |
Left upper limb area |
Helps form leads I and III |
|
RL |
Right leg |
Right lower limb area |
Often acts as a ground reference |
|
LL |
Left leg |
Left lower limb area |
Helps form leads II and III |
What each limb lead wire does
The RA lead wire collects the right arm signal. It helps the ecg machine compare electrical activity across the body. It forms part of several limb leads.

The LA lead wire collects the left arm signal. It helps create side-to-side comparisons. It works with RA and LL in the limb lead system.
The LL lead wire collects the left leg signal. It helps form lower-direction leads. It is important for leads II, III, and aVF.
The RL lead wire usually supports signal stability. Many systems use it as a ground or reference electrode. It helps reduce electrical noise.
Limb electrode comfort and safety tips
Limb placement should feel firm, not painful. The skin may feel cool when cleaned. Adhesive removal may pull hair slightly.
Tell the technician about rashes, wounds, or pain. They may choose a nearby suitable point. Do not hide skin issues due to embarrassment.
For elders, support the limb gently. For children, explain the stickers in simple words. Avoid joking that the ecg gives a shock.
Chest electrode guide for V1 to V6
Chest electrodes provide important front and side leads. These positions need more accuracy than many families expect. The technician uses rib spaces and chest lines.
The six chest electrodes are named V1, V2, V3, V4, V5, and V6. They create the chest leads on the ecg report. A standard 12-lead system includes these six precordial leads.

Where are V1 and V2 placed on the chest?
V1 is placed at the fourth intercostal space on the right side of the sternum. V2 is placed at the fourth intercostal space on the left side of the sternum. These two positions sit near the breastbone.
The technician may count rib spaces from the upper chest. This can feel slow, but it improves accuracy. Guessing these positions can cause errors.
V1 and V2 are often placed too high by mistake. A trained person checks the fourth intercostal space. Families should allow the person to locate the landmark properly.
How are V4 V5 and V6 placed on the chest?
V4 is placed at the fifth intercostal space on the left midclavicular line. V5 is placed level with V4 at the left anterior axillary line. V6 is placed level with V4 and V5 at the left midaxillary line.
V5 and V6 should stay on the same horizontal level as V4. They should not slope upward toward the armpit. This detail is easy to miss without training.
The anterior axillary line is near the front edge of the armpit. The midaxillary line runs down from the middle of the armpit. These lines help locate V5 and V6.
Where V3 fits in the sequence
V3 sits between V2 and V4. The technician first locates V2 and V4. Then V3 is placed midway between them.
This is why V4 must be correct first. If V4 is wrong, V3 can also be wrong. Correct sequence matters.
Families may see staff place V1, V2, then V4 before V3. That is not a mistake. It helps position V3 properly.
Chest electrode placement table
This table gives a family-friendly view. It is not a replacement for training. Use it to understand the process.
|
Chest electrode |
Standard location |
Plain meaning |
|---|---|---|
|
V1 |
Fourth intercostal space, right sternal border |
Right side of breastbone |
|
V2 |
Fourth intercostal space, left sternal border |
Left side of breastbone |
|
V3 |
Midway between V2 and V4 |
Between V2 and V4 |
|
V4 |
Fifth intercostal space, left midclavicular line |
Under left collarbone line |
|
V5 |
Level with V4, left anterior axillary line |
Front armpit line level with V4 |
|
V6 |
Level with V4 and V5, left midaxillary line |
Middle armpit line level with V4 |
Placement charts from emergency care training materials use the same standard chest locations for V1 to V6.
What each ECG lead wire does
Families often see many wires and feel worried. Each lead wire has a clear role. It carries a tiny electrical signal from the skin to the ecg machine.

The lead wire itself does not diagnose anything. It helps transmit the signal. The ecg machine displays patterns for a trained professional to review.
RA, LA, RL, and LL wires
RA and LA help compare signals across the upper body. LL helps compare signals between the upper body and lower left side. RL helps reduce noise in many ecg systems.
These limb lead wires help create six limb leads. Those are I, II, III, aVR, aVL, and aVF. The machine calculates some of these leads.
If RA and LA are swapped, the tracing may look unusual. If LL and RL are swapped, there may be noise or tracing changes. Staff check labels before recording.
V1 and V2 wires
V1 and V2 look at electrical activity near the right and central front chest. They sit close to the sternum. Their positions depend on correct rib space counting.
These wires can show important rhythm and conduction patterns. Conduction means how electrical signals travel through the heart. Doctors interpret these patterns with clinical context.
Families should not move V1 or V2 to avoid modesty concerns. Instead, ask for respectful covering and a same-gender attendant if needed. Privacy can be protected without poor placement.
V3 and V4 wires
V3 and V4 look at the front part of the chest. Their positions connect the early chest leads to the side leads. They help complete the chest lead sequence.
V4 is a key landmark for V3, V5, and V6. If V4 is wrong, several chest leads may shift. This is why trained placement is important.
During placement, the technician may adjust clothing carefully. They should explain each step. Families can request clear communication.
V5 and V6 wires
V5 and V6 look more toward the left side of the chest. They should sit level with V4. They should not be placed randomly near the side.
These wires may be harder to place in small rooms. They need access to the left side chest. A private and comfortable position helps.
If the person cannot lie flat, tell the technician. They may record in a safe alternative position. The doctor should know about any important change.
Skin preparation before electrode placement
Good skin contact helps reduce noise. Skin oils, sweat, lotion, and hair can weaken contact. The technician may clean or prepare the skin first.
Does skin need preparation before placing ecg electrodes? Yes, often it does. Preparation improves electrode contact and helps the ecg machine record a cleaner signal.
Usual skin preparation steps
A trained person may clean the skin with a suitable wipe. They may dry the area before applying electrodes. Wet skin can stop adhesive from holding well.

They may clip excess hair when needed. They should not shave roughly or hurt the skin. Families can ask how hair removal will be handled.
They may gently rub the skin to improve contact. This should not cause injury. Tell them if the person has fragile skin.
Family checklist before the ECG visit
Use this checklist before a home ecg appointment. It helps the visit run smoothly. It does not replace medical guidance.
-
Keep the doctor’s prescription or advice ready.
-
Keep previous ecg reports nearby, if available.
-
Choose a private, well-lit room.
-
Arrange a bed or firm couch.
-
Keep the phone charged for calls or messages.
-
Avoid applying oil or lotion before the visit.
-
Tell the technician about skin allergy or wounds.
-
Keep elders warm and comfortable.
-
Ask who will receive the ecg report.
-
Confirm whether a doctor will review the tracing.
Special care for Indian homes
Many Indian homes have limited private space. Plan ahead for dignity. Ask family members to step out when needed.
Women may prefer a female technician or attendant. Elders may need help changing clothing. Discuss this before the appointment when possible.
During monsoon or summer, sweat can affect stickers. A fan can help, but direct airflow may cause shivering. Keep the person calm and still.
Home ECG support and family roles
Home ecg visits can help families avoid travel stress. This may matter for elders, people with limited mobility, or busy caregivers. Still, home convenience does not reduce the need for correct technique.
Can a family member place ecg electrodes at home? A family member should not place ecg electrodes for medical use unless trained and guided. A doctor or trained professional should guide medical use.
Some personal wellness devices use simplified sensors. These differ from a clinical 12-lead ecg. Do not treat a phone-based or wearable reading as a full ecg report unless a clinician says so.
What families can safely do
Families can prepare the room and support the person. You can also share symptoms and medicines with the care provider. These details help the doctor understand the ecg.
You can check that the technician confirms identity. You can ask how the report will be shared. You can also ask who will explain the result.
You should not interpret ecg waves yourself. Online images can mislead. Always ask a qualified professional.
When to seek urgent medical help
If the person has severe chest pain, breathing trouble, fainting, heavy sweating, or sudden weakness, seek urgent medical help. Do not wait only for a home ecg. Follow local emergency guidance.
An ecg is one test. It does not replace emergency care. A normal-looking home tracing should not override serious symptoms.
Families should keep emergency numbers ready. They should also know the nearest hospital route. Quick action can matter during serious symptoms.
Phone-friendly buying and care tips
Many Indian families shop from a phone. Keep the buying process simple. Match accessories with the machine and care plan.
Check product photos and labels clearly. Look for connector shape, electrode type, and pack details. Avoid buying based on vague names alone.
For example, see disposable ecg electrodes, ecg lead wires, and ecg machine accessories.
Choosing ECG electrodes and lead wires
The goal is not to push random accessories. The goal is to match the right item to the right use.
ECG electrodes and lead wires must fit the device and the care setting. A hospital machine, clinic machine, and home-use monitor may not use the same connectors.
Questions to ask before buying
Before buying, ask a trained professional or service provider. Simple checks can prevent waste. They can also prevent unsafe improvisation.
-
What ecg machine or monitor will be used?
-
Does it need snap, clip, or tab electrodes?
-
How many lead wires are required?
-
Is this for monitoring or a 12-lead ecg?
-
Will a technician apply the electrodes?
-
Does the patient have sensitive skin?
-
Is the accessory meant for single use?
-
Who will check compatibility before use?
Do not assume all ecg supplies fit all machines. Similar-looking connectors may differ. Poor fit can cause signal loss or damage.
Electrode comfort factors
Comfort matters during ecg recording. The person must stay still. It is harder to stay still when stickers pull, itch, or feel loose.
Adhesive quality affects comfort and contact. Gel type may also affect skin feel. Some people may have skin sensitivity to adhesive gel.
Tell the care provider about past skin reactions. This is important for elders and children. Do not reuse disposable electrodes.
Lead wire handling tips
Lead wires should be handled gently. Pulling from the cable can weaken connections. Hold the connector when removing it.
Keep wires untangled before the visit. Tangled wires slow placement and may pull electrodes. Store them dry and clean.
Do not repair broken wires with tape for medical use. A damaged wire can create poor signal quality. Ask a technician about replacement.
Common ECG placement mistakes to avoid
Families do not need to perform placement. But they can understand common mistakes. This helps them value trained care.

Wrong ecg placement often starts with rushing. A busy setting, poor lighting, or unclear clothing access can cause errors. Good setup prevents many problems.
Mistake 1: Placing chest electrodes too high
V1 and V2 need the fourth intercostal space. If placed too high, the ecg view changes. This can affect interpretation.
The technician may count down from the collarbone area. This takes time. Do not rush this step.
For women, respectful technique matters. Electrodes are placed based on chest landmarks. Privacy should be protected during the process.
Mistake 2: Sloping V4, V5, and V6 upward
V4, V5, and V6 should sit on one horizontal level. V5 and V6 should not climb upward into the armpit. This is a common practical error.
The technician should locate V4 first. Then V5 and V6 stay level with it. This gives the intended side chest leads.
Families may not spot this accurately. Still, they can allow enough space and time. Proper access helps proper placement.
Mistake 3: Reversing limb wires
Limb lead wires have labels and colors. Color standards may vary by system or region. Labels are safer than memory.
If lead wires are reversed, the tracing may change. The technician should check RA, LA, RL, and LL before recording. Families should avoid moving wires once attached.
If a wire falls off, call the technician. Do not guess where it was placed. Reattachment must match the correct label.
Mistake 4: Poor skin contact
Loose electrodes create noise. Sweat and oil can reduce grip. Thick hair can prevent the gel from touching skin well.
Skin preparation helps. The technician may clean and dry the area. They may clip hair if needed.
Families can help by avoiding lotion before the visit. They can also keep the room comfortable. Less sweating often means better contact.
Reading the ECG report as a family
An ecg report may look technical. It may show waves, numbers, and printed comments. Families often feel anxious when they see unfamiliar words.
Do not panic over machine statements. Automated ecg interpretations can be limited. A doctor should review the tracing with the patient’s condition.
What families can note
You can note the time of symptoms. You can record medicines taken before the ecg. You can also mention tea, coffee, tobacco, or activity if relevant.
Give this information to the doctor. ECG findings make more sense with context. The same tracing may need different action in different people.
Keep reports safely. Many Indian families use WhatsApp or phone galleries. Also keep a clear PDF or printed copy when possible.
What families should not do
Do not compare ECGs online and self-diagnose. Do not start or stop medicines based on the tracing alone. Do not ignore symptoms because a report looks normal.
Do not share private ecg reports in public groups. Reports contain personal health information. Share them only with trusted healthcare professionals.
Do not buy accessories to run repeated ECGs without advice. More readings do not always mean better care. Follow the doctor’s plan.
Quick reference checklist for ECG placement support
This checklist is for family support only. It does not teach self-placement. A trained person should still place and check the electrodes.
Before placement
-
Confirm the doctor requested an ecg.
-
Ask whether it is 3-lead, 5-lead, or 12-lead.
-
Keep the patient relaxed and still.
-
Provide privacy and proper lighting.
-
Remove metal items if asked.
-
Avoid skin oil or lotion.
-
Share allergy and skin details.
-
Keep previous reports ready.
During placement
-
Let the technician access the correct areas.
-
Ask for respectful covering when needed.
-
Do not shift stickers yourself.
-
Avoid talking during recording.
-
Keep the phone silent nearby.
-
Support children or elders calmly.
-
Report pain, dizziness, or discomfort.
-
Allow repeat recording if needed.
After recording
-
Ask when the report will be available.
-
Ask who will explain the findings.
-
Save the report safely.
-
Remove stickers gently if advised.
-
Check skin for irritation.
-
Follow the doctor’s next steps.
-
Seek urgent care for serious symptoms.
Simple comparison of ECG accessories
ECG accessories can sound similar. Families often search for ecg lead placement but need buying guidance. The table below separates common items.
|
Item |
What it does |
Buying note |
|---|---|---|
|
Disposable ecg electrode |
Sticks to skin and senses signal |
Check type and skin suitability |
|
Lead wire set |
Connects electrodes to cable or device |
Match machine connector and labels |
|
Patient cable |
Main connection to ecg machine |
Must match device model |
|
ECG paper |
Prints the tracing |
Check size and machine need |
|
Prep items |
Help skin contact |
Use as guided by staff |
Choose based on the actual machine. Ask the provider before ordering if you are unsure. This prevents mismatch and unsafe use.
ECG accessories support recording, not treatment.
Families need confidence, not confusion. Plain labels and simple filters help on phones. Short descriptions reduce wrong orders.
Useful links can guide next steps. Examples include how to choose ecg electrodes and ecg accessory compatibility guide.
Practical privacy and dignity tips
ECG placement may require chest access. This can feel sensitive in Indian homes. Good planning protects dignity.
Ask who will perform the test before the visit. If the patient prefers a female technician, request one early. Availability may depend on the service provider.
Keep only necessary people in the room. Give the patient a sheet or dupatta when possible. Explain the process to reduce fear.
For elders
Elders may feel cold or anxious. Keep the room warm enough. Move slowly while changing position.
Fragile skin needs care. Tell the technician about bruising or skin tears. Remove electrodes gently after the test.
Hearing problems can cause confusion. Speak clearly and calmly. Let one family member coordinate.
For children
Children may fear wires. Explain that stickers record signals. Tell them the ecg does not give shocks.
Let a parent stay nearby. Keep the child still with calm words. Avoid scolding during the recording.
Use simple praise after the test. This helps if future tests are needed. The technician should still handle placement.
For women and modesty concerns
Women may feel uncomfortable during chest electrode placement. Privacy is important. A trusted attendant can remain if the patient wants.
Correct placement should not be sacrificed for modesty. Instead, use respectful draping and clear communication. A trained professional can balance both.
If the patient is pregnant, tell the care provider. ECG recording may still be requested. Placement and interpretation remain professional tasks.
Key takeaways for families
ECG leads are views of the heart, not just wires. Electrodes collect signals from the skin. Lead wires carry those signals to the machine.
A standard ecg has twelve leads and ten electrodes. Four electrodes relate to limbs. Six electrodes go on the chest.
Correct placement needs training. Chest positions depend on rib spaces and body lines. Limb wires need correct labels and contact.
Family members can prepare the room, support comfort, and share medical details. They should not place electrodes for clinical use without training. A doctor or trained professional should guide medical use.
Quick memory guide
-
V1 and V2 sit near the sternum.
-
V3 sits between V2 and V4.
-
V4 sits on the left midclavicular line.
-
V5 sits level with V4 near the front armpit line.
-
V6 sits level with V4 and V5 near the middle armpit line.
-
RA, LA, RL, and LL belong to limb electrode placement.
-
Ten electrodes can create twelve ecg leads.
-
Good skin contact helps reduce noise.
-
Serious symptoms need urgent medical care.
Conclusion
ECG leads help doctors view the heart’s electrical activity from several angles. For Indian families, the main goal is safe, correct, and respectful recording. Good electrodes, compatible lead wires, clean skin, and trained placement all support a useful ecg tracing.
Use this guide to understand terms like ecg lead location, ecg lead position, and electrocardiogram lead placement. Do not use it to replace clinical training. For medical use, always follow a doctor or trained professional.
Explore more heart-health devices
ECG machine
Explore Medical Collections
All Categories
Abdominal & Maternity Support

Accessories

Accu-Chek Instant Strips: Use, Compatibility, Price & Blood Sugar Testing Guide
Accu-Chek Instant Strips: Uses, Features & Complete Guide

accupuncture

Acupuncture Needles & Supplies

Advanced Physiotherapy Machines & Lumbar Physiotherapy

Airways

Alcohol Swab: Uses, Safe Use and Disposal Guide

Ambu Bag Full Form: Is There an Official Meaning?

Ambu Bag: Parts, Uses and Safety Guide

Ambu Full Form: What the Name Means and BVM Basics

Ambulance

Anatomy Models
Anesthesia Machine
You may also need
FOR YOURecommended for you
Save 64%
Save 73%
Save 44%
Save 14%
Save 24%