


Empty collection
This collection does not contain any products.
Peak Flow Meter: How to Use It and Read the Zones
peak flow meter readings show how fast you can blow air out after taking a full breath. Use three correct blows, record the highest reading, and compare it with your doctor-set traffic-light zones. These steps help home users in India track changes without treating one number as a complete breathing assessment.

What does a peak flow meter measure?
A peak flow meter measures peak expiratory flow, often shortened to PEF. This means the fastest airflow you produce during a hard, quick breath out. It measures speed, rather than the total amount of air your lungs hold.
Most home devices show the result in litres per minute, written as L/min. A sliding pointer may stop beside a numbered scale. Some devices display the result electronically instead.
Think of this airflow measurement device as one tool for checking changes over time. It does not explain every cause of breathlessness. Your effort, technique, and device condition also affect the result.
A lower result can suggest narrower airways, but it needs context. A weak blow or poor mouth seal can also produce misleading readings. Compare valid results with your own reference, not someone else's score.
The phrase “lung function meter” sometimes describes this device loosely. However, a peak flow test captures only one part of lung function. It cannot provide every measurement available through formal testing.
Home users who may benefit from a peak flow meter
Who might use a peak flow meter at home? Your doctor may suggest one when regular breathing records would help assess your condition. Some people with asthma use it alongside symptom notes and a written action plan.
Peak flow monitoring can be useful when someone finds breathing changes difficult to notice. It may also support a doctor-requested assessment over several days or weeks. The purpose and recording schedule should be clear before you begin.
Not everyone with asthma needs the same monitoring routine. Ask whether you need regular readings, occasional readings, or a temporary diary. Avoid creating an intensive schedule simply because another family follows one.
For home use, ask your doctor to write down:
- Why you need readings and how long you should keep them.
- Which times suit your monitoring plan.
- Your personal best and individual zone boundaries.
- What action each zone requires.
- Which symptoms mean you should seek help immediately.
Keep these instructions with your diary. If written English feels difficult, request an explanation in your preferred language. A family member can help organise records without interpreting results independently.
Why a normal reading differs between people
Why does a normal reading differ from person to person? Age, height, and sex influence expected peak flow values. These factors help explain why two healthy people may produce different numbers.
Your own established readings matter more than a neighbour's result. A number that suits one person may represent a meaningful drop for another. Avoid using family comparisons to decide whether your breathing is safe.
Printed reference charts describe groups, not your complete situation. They cannot account for every individual difference or replace your doctor's assessment. Do not choose a target simply because it appears beside your age.
Technique also matters when comparing results across different people. Someone learning the manoeuvre may initially produce inconsistent blows. Ask for a technique check before treating those numbers as a reliable baseline.
For children, growth adds another reason to review the reference regularly. Ask when your child's personal best should be reassessed. Never keep using an old target indefinitely without checking its suitability.
The useful question is not whether your number beats someone else's. It is whether your valid result has changed from your own agreed reference.
Establishing your personal best peak flow meter reading
What is a personal best peak flow reading? It is your highest reliable reading during a period when your breathing is well controlled. Your doctor helps establish and confirm this reference.
The process often involves repeated measurements over about two to three weeks. Your doctor decides the schedule and checks whether the readings are suitable. Do not select a reference from an unreviewed internet chart.
There are two different “highest” numbers to understand. The highest valid blow during one session becomes that session's recorded result. Your personal best comes from the longer assessment period.
Confusing these numbers creates problems. Yesterday's best blow does not automatically become today's reference. Otherwise, the comparison point would keep moving whenever your readings changed.
Ask your doctor to record the confirmed personal best clearly. Put it near your diary's zone information, rather than on a loose scrap. Include the device you used while establishing it.
Your reference may need review as circumstances change. Growing children and people changing devices should ask about reassessment. Do not reset your personal best downward because recent readings have become lower.
Choosing a suitable peak flow meter range
A handheld peak flow meter must suit the person using it. Low-range devices are generally intended for smaller flows, including those produced by small children. Standard-range devices suit many older children and adults.
Ask your doctor which range fits your needs. Age alone should not be your only guide. Someone with lower expected airflow may need a different range from another person of similar age.
Do not assume every model uses identical scales or reset methods. Check the exact leaflet supplied with your device. Learn where its starting position sits before your first home session.
Before choosing a device, consider practical handling:
- Can you see the scale clearly without guessing?
- Can you reset the indicator without difficulty?
- Can you hold it without covering moving parts or openings?
- Can you follow its cleaning instructions at home?
- Does your doctor agree that its range is suitable?
These questions focus on usable monitoring, not impressive packaging. A device is less helpful if you cannot peak flow or handle it consistently.
Keep its instruction leaflet somewhere accessible. A photograph of the leaflet may help when travelling. Still, retain the original instructions if possible.
A plain checklist before every home measurement
Use this checklist before starting. It follows the usual preparation steps, but your model's leaflet remains important. Ask someone to observe your first attempts if you need help.
- Check that the device belongs to you and matches your usual monitoring equipment.
- Inspect the mouthpiece for dirt, damage, or anything lodged inside.
- Make sure the device is dry and ready for use.
- Move the indicator to the starting position described in its leaflet.
- Remove food, chewing gum, or sweets from your mouth.
- Stand upright, or sit upright if that suits you better.
- Keep your shoulders relaxed rather than bending over the device.
- Hold the device as instructed, without blocking its outlet or indicator.
- Keep your diary and written zone plan nearby.
- Notice how you feel before deciding whether testing is appropriate.
If you already have severe breathing difficulty, seek urgent help. Do not delay assistance while preparing equipment or completing this checklist. Symptoms can matter more than the displayed number.
How do I blow into a peak flow meter correctly?
Take the deepest comfortable breath, seal your lips around the mouthpiece, then blow out hard and fast. Use one sharp blast rather than a slow, prolonged breath. Repeat correctly three times, resting briefly between attempts.
Follow this sequence for each session:
- Reset the indicator. Return it to the correct starting position before every blow.
- Get upright. Use the same comfortable standing or seated position each time.
- Breathe in fully. Take the breath before placing the device in your mouth.
- Seal your lips. Keep your tongue clear of the mouthpiece opening.
- Blow sharply. Produce one hard, fast outward blast.
- Peak flow the scale. Note where the indicator stops without moving it accidentally.
- Rest and repeat. Complete three valid attempts using the same method.
- Record the highest. Keep the highest valid result, not the average.
Do not breathe in through the device unless its instructions specifically require that. Avoid blocking the mouthpiece with your teeth or tongue. Hold it firmly without covering its outlet.
For practice, focus on “full breath in, quick blast out.” You are not trying to sustain a musical note. Ask your doctor or pharmacist to watch your technique if instructions remain unclear.
Why only the highest valid blow belongs in your diary
Why do I note only the highest of several blows? The test seeks your fastest airflow during a correctly performed effort. An incomplete breath or weaker effort can underestimate that flow.
Averaging the attempts mixes stronger and weaker performances together. That produces a different number from the recommended session result. Record the highest valid attempt instead.
For example, imagine three correct readings of 300, 320, and 310 L/min. Record 320 L/min for that session. These numbers illustrate recording only, not a normal range or personal target.
“Valid” remains essential. A high number after coughing does not automatically count. Do not choose a reading simply because it looks reassuring.
If attempts vary widely, review your method rather than calculating a compromise. Check your starting position, breath depth, lip seal, and quick outward effort. Ask for help if differences remain difficult to explain.
You can keep rough attempt notes separately while learning. Make the official diary entry easy to identify. That prevents someone from mistaking a practice attempt for your session result.
Handling coughing, missed steps, and lightheadedness
Do not record an attempt interrupted by coughing or an obvious skipped step. Rest, correct the problem, and repeat only when comfortable. The aim is three valid efforts, not three rushed efforts.
If you forgot to reset the pointer, that attempt cannot provide the intended fresh reading. If your lips leaked, review the seal. If your tongue blocked the opening, reposition it before trying again.
Stop if you feel lightheaded or dizzy. Sit safely and rest rather than immediately forcing another blow. Do not use that interrupted attempt as a reliable measurement.
Repeat only after the feeling has settled and you feel well enough. Persistent dizziness, worsening breathlessness, or difficulty completing the test needs medical advice. Severe symptoms require urgent help rather than further testing.
Avoid turning measurement into a contest. Repeating endlessly to reach a preferred number defeats useful monitoring. Record a note if you cannot complete a reliable session.
For example, write “could not complete because of repeated coughing.” This is more honest than filling the gap with yesterday's reading. Share the difficulty with your doctor.
What do the green yellow and red zones mean?
The zones compare your reading with your personal best. Green generally means 80–100%, yellow means 50–80%, and red means below 50%. Each band must connect to doctor-given steps in your written plan.
| Zone | Share of personal best | Meaning for home monitoring | What to do |
|---|---|---|---|
| Green | 80–100% | Your reading is within the usual green band | Follow your plan and remain alert to symptoms |
| Yellow | 50–80% | Your airflow may have fallen below your usual level | Follow the yellow-zone steps and contact your doctor as directed |
| Red | Below 50% | A medical alert requiring immediate action | Follow your emergency instructions and obtain urgent medical help |
These are traffic-light bands, not a complete assessment. A green reading does not cancel severe symptoms. A red reading should never become a reason to spend extra time perfecting your diary.
The commonly written bands meet at 80%. To avoid confusion, ask your doctor to write exact numerical boundaries. Your plan should clearly state where a boundary reading belongs.
Doctors may personalise thresholds or instructions. Use your own written plan rather than copying another person's colour settings. Keep the plan somewhere you can reach without searching.
Working out your peak flow meter zones without guessing
Zone percentages use your confirmed personal best as the reference. They do not use an average from a general chart. Ask your doctor to calculate and confirm your actual boundaries.
The basic calculation is:
Current reading ÷ personal best × 100 = percentage of personal best.
Here is an illustrative example, not a suggested target. Suppose a doctor has confirmed a personal best of 400 L/min. Eighty percent equals 320 L/min, while 50% equals 200 L/min.
| Example reading | Calculation | Percentage |
|---|---|---|
| 360 L/min | 360 ÷ 400 × 100 | 90% |
| 240 L/min | 240 ÷ 400 × 100 | 60% |
| 160 L/min | 160 ÷ 400 × 100 | 40% |
The first example falls within the general green band. The second falls within yellow, and the third falls within red. Your own numbers will differ if your personal best differs.
You should not need mental arithmetic during breathing difficulty. Ask for the boundaries in L/min on your plan. Check that any adjustable coloured markers match those instructions.
If your scale does not show a calculated boundary exactly, ask how to interpret nearby readings. Do not invent your own rounding rule. Clear instructions prevent avoidable uncertainty.

Recording peak flow readings in a useful home diary
A useful diary connects the number with timing, symptoms, and relevant circumstances. Record the highest valid reading promptly, rather than relying on memory. Bring the record when discussing your breathing with your doctor.
A notebook works if you can keep entries clear. You can also use a simple phone note. Choose the format you are most likely to maintain.
| Diary field | What to enter |
|---|---|
| Session timing | Morning, evening, or another doctor-requested time |
| Highest valid result | The session reading, with L/min |
| Zone | The band shown by your personal plan |
| Symptoms | Your own brief description of how you felt |
| Measurement problem | Coughing, a missed step, or inability to finish |
| Relevant context | Unusual exposure, illness, or a different device |
Consider brief entries such as “felt usual” or “chest felt tight.” Write what happened rather than interpreting the cause. “Lower reading after dusty travel” is an observation, not proof of a trigger.
Keep missing sessions visible. Leave a blank or write “missed,” rather than copying another result. A truthful record is more useful than a complete-looking one.
If you use an app, check the units before entering numbers. Ensure the graph uses your agreed reference. Do not accept automatic zone settings without confirming them with your doctor.
Building a consistent peak flow monitoring routine
Use the same device whenever possible. Different meters can produce slightly different results, making comparisons harder. Tell your doctor if you start using a replacement or another model.
Measure at the times your doctor recommends. Consistent timing matters because readings can vary through the day. A morning result should not automatically be compared with an unusually timed evening session.
Keep your posture and technique consistent too. If you usually sit upright, avoid switching casually between slouching and standing. Comparing like with like makes the record easier to interpret.
For an Indian household, link the reminder to a dependable daily event. You might place a reminder beside your diary or phone charger. Choose something that fits your doctor's timing instructions.
Prepare a small monitoring kit containing the device, diary, pen, and written plan. Keep cleaning instructions nearby but separate from wet items. This simple arrangement avoids searching during a busy morning.
If several relatives help a child, agree who records each session. Use the same diary rather than scattered messages. A shared routine should make monitoring calmer, not more demanding.
Reading trends without overinterpreting one number
Peak flow analysis means examining patterns, not assigning a diagnosis to each entry. Your doctor may compare repeated readings with symptoms and circumstances. A single number cannot explain every change.
Can my reading drop before I feel asthma symptoms? Yes, peak flow can fall before you notice breathing symptoms. That is one reason doctor-directed monitoring can be useful.
Feeling comfortable does not mean you should ignore a lower zone. Follow your written instructions even when the change feels surprising. Conversely, significant symptoms still matter when the number appears reassuring.
When reviewing your diary, note whether lower results recur at similar times. Also note whether technique problems occurred during those sessions. Avoid deciding that every dip represents the same cause.
A diary might show repeated lower readings after a particular work shift. That pattern deserves discussion, but does not prove a workplace diagnosis. Your doctor may request a more specific recording schedule.
Do not wait for a long-term pattern when your plan requires action now. Trend review belongs alongside zone instructions, not above them. Keep urgent decisions separate from routine record organisation.
Why a dirty peak flow meter can give wrong readings
Why can a dirty meter give wrong readings? Dirt, saliva, and mucus can interfere with the device's normal operation. Collected material can make airflow measurements inaccurate.
The mouthpiece may look clean while material remains elsewhere inside. That is why wiping the outside alone does not replace recommended cleaning. Follow the leaflet for the complete device.
Check for obvious blockage before every session. Also notice whether the indicator moves as expected. A sticking or damaged part needs attention rather than a harder blow.
Never assume dirt is the explanation for a worrying result. A low reading may reflect a real breathing change. Follow your zone plan while arranging advice about a possibly faulty device.
For example, repeated low results should not be dismissed because cleaning is overdue. The equipment concern and the breathing concern can exist together. Severe symptoms require help regardless of which explanation seems likely.
Keep brief maintenance notes if they help you stay organised. You might mark when you cleaned the device or noticed damage. Avoid changing diary readings after cleaning unless you perform a new valid session.
Cleaning your peak flow meter at home
How do I clean a peak flow meter at home? The usual method uses warm soapy water, a thorough rinse, and complete air drying. Follow your model's leaflet for cleaning frequency and permitted handling.
Use these general steps:
- Check whether the instructions permit any parts to be removed.
- Wash using warm water and mild soap as directed.
- Move the device gently in the water to loosen residue.
- Rinse thoroughly using clean water.
- Gently remove excess water without forcing the mechanism.
- Leave everything to air dry fully in the recommended position.
Avoid hot or boiling water. Do not use harsh cleaners, brushes, or objects pushed inside. These methods can damage parts or interfere with accurate operation.
Do not put a damp device straight into a closed pouch. Choose a clean drying space where it will not be disturbed. Use the leaflet's drying instructions rather than improvising with heat.
Cleaning schedules differ between products. Do not apply one brand's schedule automatically to another. When instructions are missing, request the correct leaflet from the manufacturer or ask your pharmacist.
Before the next session, check that the device is dry and correctly assembled. If movement seems abnormal, seek advice. Cleaning should not leave you guessing whether the mechanism still works.
Keeping the device practical in an Indian home
Set aside a clean storage space for your monitoring kit. A dedicated pouch or drawer can keep the leaflet and diary together. Avoid mixing the device with loose household items.
Make the routine manageable during school mornings, shift work, or travel. Pack the same device when your doctor expects continued monitoring. Keep your written plan accessible, not buried in luggage.
If you use separate home and travel devices, discuss comparison with your doctor. A change in equipment can affect the numbers you record. Note which device produced each reading.
Children may need calm supervision to complete the steps. Explain that the aim is a correct blow, not beating a sibling. Praise following the method rather than reaching a particular number.
For older relatives, consider whether someone should help peak flow read the scale. The helper can check the pointer without changing its position. Record the number actually shown, not an expected result.
Keep a short written reminder beside the diary: reset, breathe fully, seal, blast, rest, repeat, record. This reminder supports the full instructions rather than replacing them. Ask for another demonstration if handling remains difficult.
Understanding familiar peak flow meter names
You may encounter names such as TruZone, Mini-Wright, and Philips Respironics Personal Best. These are product names, not different breathing measurements. Their instructions still need individual attention.
The truzone peak flow meter has manufacturer instructions covering inspection, resetting, blowing, and cleaning. Do not assume its resetting method matches another device. Peak flow read the leaflet before using it.
The mini wright peak flow meter appears in standard-range and low-range versions. Confirm which version your doctor recommends. Similar-looking names do not mean every scale suits the same user.
The philips respironics personal best peak flow meter also has its own care instructions. Its product name does not establish your personal best automatically. Your reference still needs a doctor-guided assessment.
These names are examples, not a ranking or buying recommendation. Do not switch between them simply to find a higher result. Consistent equipment is important for meaningful comparisons.
If you replace your device, tell your doctor and ask about reviewing your reference. Keep the new leaflet even if the device looks familiar. Small handling differences can matter.
Peak flow meter versus spirometry
Can a peak flow meter replace a lung function test at a clinic? No, home peak flow monitoring cannot replace spirometry when your doctor requests it. The tests provide different amounts of information.
| Feature | Peak flow measurement | Spirometry |
|---|---|---|
| Main measurement | Fastest outward airflow | Exhaled air volume and airflow over time |
| Typical home role | Tracking repeated readings against an agreed reference | Not replaced by a home peak flow diary |
| Information provided | One main airflow value | Several measurements used in clinical assessment |
| Diagnostic limitation | Cannot independently establish asthma or COPD | Results still need interpretation with your medical history |
A peak flow meter for asthma can support assessment and ongoing monitoring. Repeated PEF measurements may contribute to diagnosis when a doctor interprets them. One home reading cannot independently diagnose asthma or exclude it.
The device also cannot diagnose COPD on its own. COPD assessment uses medical history and appropriate testing, particularly spirometry. Do not label yourself from an online peak flow chart.
If your doctor requests formal testing, bring your home diary too. The records may provide useful context between appointments. They complement the assessment rather than making it unnecessary.
When symptoms matter more than your peak flow meter reading
When should I call a doctor even if my reading looks fine? Seek urgent help for severe wheezing, chest tightness, or worsening breathing difficulty. Do not let an apparently normal number delay assistance.
Get emergency help if breathing difficulty prevents normal speech. Blue or grey lips, unusual drowsiness, confusion, or marked exhaustion are also danger signs. Do not continue testing to obtain a more convincing result.
A red-zone result is a medical alert. Follow your doctor-given emergency instructions immediately. Do not spend time recalculating percentages or collecting extra peak before seeking help.
Less severe but repeated symptoms also deserve medical advice. Mention symptoms that disturb sleep or make usual activities difficult. Explain when they occurred, even if the recorded number stayed within green.
If you cannot perform the test because breathing feels difficult, say so clearly. Failure to obtain a reading is not reassurance. Your symptoms still need assessment.
For home users in India, keep your doctor's contact and local emergency details with your plan. Tell a family member where these are stored. Prepare this information while you feel well, rather than during an urgent situation.

Making your next review more useful
Bring your usual device, diary, and written zone plan when discussing your peak. Ask someone to watch a complete measurement session. This helps separate handling problems from changes needing further assessment.
Prepare a short list of practical uncertainties. You might need clarification about boundary peak, missed sessions, or replacing equipment. Specific questions are easier to resolve than a general concern about “bad numbers.”
Point out any sessions affected by coughing or dizziness. Also mention times when symptoms and peak seemed inconsistent. Those details deserve attention rather than removal from your record.
Before leaving, check that you understand three things: your current reference, your exact zone boundaries, and your next steps. Ask for written clarification when instructions feel unclear. You should not need to interpret a colour alone.
The everyday takeaway
Reliable asthma peak flow monitoring depends on correct technique, consistent equipment, and an agreed personal reference. Take three valid blows, record the highest, and follow your doctor-set zones. Keep the device clean and include symptom notes with your peak.
Most importantly, treat the number as useful information, not a safety guarantee. Severe symptoms require urgent help even when the peak looks reassuring. Your device supports your written plan; it never replaces medical assessment.
Explore Medical Collections
All Categories
Abdominal Belt: Support After Surgery, in Pregnancy and After Delivery

Accessories
Accu-Chek Instant Strips: Use, Compatibility, Price & Blood Sugar Testing Guide
Accu-Chek Instant Strips: Uses, Features & Complete Guide

accupuncture

Acupuncture Needles & Supplies

Advanced Physiotherapy Machines & Lumbar Physiotherapy
AED Defibrillator: How It Works, Who Can Use It and Where to Place It

Airways
Alcohol Swab: Uses, Safe Use and Disposal Guide
Ambu Bag Full Form: Is There an Official Meaning?
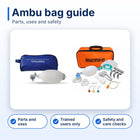
Ambu Bag: Parts, Uses and Safety Guide
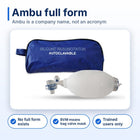
Ambu Full Form: What the Name Means and BVM Basics

Ambulance

Anatomy Models