


Featured ChoiceSave 37%

Save 36%

What customers say
★★★★★ 5.0 · 3 reviews
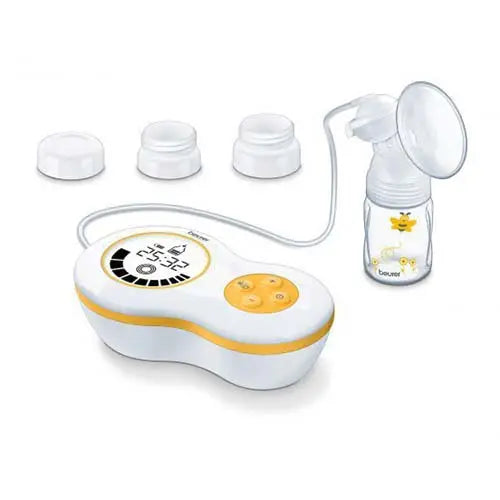
 Beurer BY 40 Electric Breast Pump
“It's quiet, easy to use, and incredibly efficient. The adjustable settings make it comfortable, and I love ...”
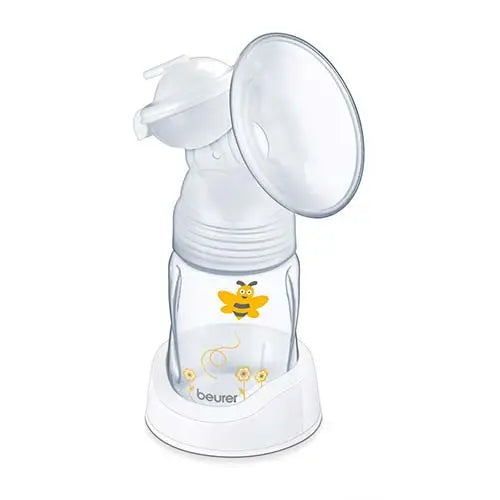
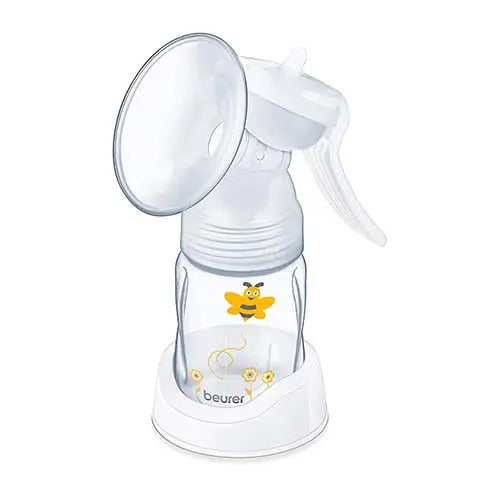
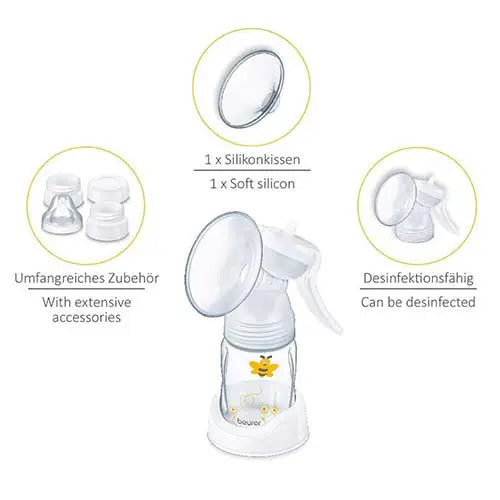
 Beurer BY 15 Manual Breast Pump
“Easy to use, compact, and comfortable. Ideal for quick and efficient pumping sessions. A great manual option!”
“It's lightweight, easy to use, and works perfectly for on-the-go moms. The suction is gentle yet effective,”
Breast Pump: Manual or Electric, Flange Fit and Cleaning
Choose a manual breast pump for occasional, quieter expressing, or an electric breast pump for frequent sessions. Both need comfortable flange fit, gentle suction, and careful washing after every use. This guide explains choosing, measuring, cleaning, and storing expressed breast milk, with practical advice for homes in India.
Should I choose a manual or an electric breast pump?
Choose a manual breast pump when you express occasionally and prefer hand control without electricity. Choose an electric breast pump when you express regularly or want the motor to handle repeated suction. Your routine, comfort, and available rinsing time matter more than a long feature list.


A manual pump usually works through a handle that you squeeze and release. You control the rhythm yourself, but repeated squeezing takes effort. Manual pumps are generally slower and quieter than electric models.
An electric model uses a powered motor. Some models express from one breast, while double models work on both breasts together. Double pumping can reduce expressing time, although your experience still depends on fit and comfortable use.
Consideration |
Manual breast pump |
Electric breast pump |
|---|---|---|
Operation |
You squeeze a handle |
A motor creates suction |
Common use |
Occasional expressing |
Regular or frequent expressing |
Effort |
Repeated hand movement |
Less repeated hand movement |
Sound |
Usually quieter |
Motor sound varies by model |
Power |
No electrical supply |
Mains power, batteries, or charging |
Expressing both sides |
Usually one breast at a time |
Double models offer simultaneous expressing |
Planning |
Check handle comfort |
Check charging and power requirements |
These differences describe broad pump types, not promises about individual products. Read each model’s instructions before deciding. A portable electric model may still need several separate parts for washing.
Think through an ordinary day rather than an ideal one. Consider where you will sit, wash parts, dry them, and refrigerate expressed breast milk. Include that whole routine when comparing options.
For example, occasional expressing at home may suit a simple manual model. Several daily sessions may make powered operation worth considering. Neither choice removes the need for a suitable breast pump flange.
Before buying, write down your main difficulty. It might involve limited time, hand effort, power access, or carrying equipment. Use that need to guide your shortlist instead of choosing through advertisements alone.
Match your breast pump to your home routine
Start with three practical questions: where, how often, and with what support. These answers help you compare equipment without getting lost in settings. Include the person who might help clean or pack your kit.
Check the full instructions before purchasing. Health regulators recommend considering assembly, cleaning, portability, and power access when choosing equipment. A breast pump should fit your surroundings as well as your expressing plans.
For home use in India, ask the seller clear questions about support. Request the model’s manual and the names of compatible replacement parts. Avoid relying only on a short demonstration video.
Use this buying checklist:
Check whether the package includes your likely flange size or offers compatible alternatives.
Find out how many washable pieces need removal after each session.
Ask where you can obtain replacement valves, membranes, connectors, and tubing.
Confirm the supplied adapter and charging arrangements before using electrical equipment.
Check whether the instructions explain washing each component separately.
Ask how the seller handles faults and replacement requests.
Compare the complete kit, not just the motor or handle.
Keep these answers together when comparing models. One option may suit home use but feel awkward during travel. Another may pack neatly but require a drying arrangement you cannot easily manage.
Plan for interruptions if your chosen pump needs electricity. Regulators suggest considering backup arrangements when power or replacement batteries are unavailable. A manual backup may help some users, but it also needs its own cleaning routine.
Do not buy several accessories before understanding the basic kit. First identify which items your model actually needs. Then decide whether spare washable parts would simplify your day.
Keep the purchase receipt, model details, and manual together. Save a photograph of the parts diagram on your phone. This makes later conversations with customer support more specific.
What is a flange and why does its size matter?
A flange is the funnel-shaped part that rests against your breast and surrounds your nipple. Its tunnel guides nipple movement during suction. A suitable fit allows movement without painful rubbing or excessive pulling of surrounding tissue.
You may also see the term “breast shield” in pump instructions. Check the diagram because manufacturers sometimes name connected pieces differently. Identify the flange itself before ordering another size.
The flange size usually describes the tunnel diameter in millimetres. It does not describe your whole breast or bra size. Measuring the nipple provides a starting point, followed by checking comfort during pumping.
A flange that looks comfortable while resting may behave differently during suction. Watch how your nipple moves rather than judging the outer funnel alone. Stop if the movement causes pain, catching, or bruising.
Keep the following distinction clear:
Nipple measurement: The width across the nipple’s base.
Flange measurement: The tunnel size listed by the manufacturer.
Fit assessment: How the nipple and surrounding tissue behave during use.
These measurements relate to each other, but they are not interchangeable. Your manufacturer’s sizing chart connects the first measurement with a starting flange choice. Your comfort check then helps assess that choice.
Avoid choosing a larger flange simply because you have larger breasts. Also avoid assuming that the included flange suits everyone. Treat the supplied size as equipment to assess, not a personal standard.
Measure for your breast pump flange carefully
How do I measure my nipple for the right flange size? Measure across the nipple’s base in millimetres, excluding the surrounding areola. Check both nipples, then use your breast pump manufacturer’s chart to select a starting flange size.
The areola is the darker area around the nipple. Including it gives the wrong measurement for flange selection. Use a ruler with clear millimetre markings or a suitable manufacturer’s measuring guide.
Follow this measuring sequence:
Wash your hands and prepare a clean measuring tool.
Read the measuring instructions supplied for your unit or flange.
Find the nipple’s base, where it meets the areola.
Measure straight across that base without including the areola.
Record the measurement for each side separately.
Compare each result with the correct manufacturer’s chart.
Check the selected flange during gentle pumping before settling on it.
A flange tunnel is usually slightly larger than the measured nipple. However, manufacturers recommend different allowances, so one universal addition does not suit every design. Follow the chart for your exact equipment rather than copying another person’s calculation.
For instance, one chart may recommend a different starting allowance from another. This does not mean you measured incorrectly. It means the design and sizing approach also matter.
If you print a measuring guide, follow its scaling instructions. An incorrectly scaled page can change the apparent measurement. Spectra specifically instructs users to print its measuring template at full scale.
Write down which chart you used beside each measurement. Include the flange model if you own different kits. This avoids confusing a nipple measurement with a flange size later.
Recheck fit when pumping becomes uncomfortable, even if the flange previously felt suitable. Your two sides may need different sizes, and fit can change over time. Seek help if repeated size changes leave you uncertain.
Check breast pump flange fit during use
What are the signs of a wrong flange size? Warning signs include painful rubbing, pinching, swelling, or excessive areola movement inside the tunnel. These signs need a fit review, although suction and positioning can also contribute to discomfort.
Do not judge fit through one sign alone. First centre the nipple and check your suction setting. Then observe movement without pressing the flange hard against your breast.
What you notice |
What it may suggest |
Sensible next step |
|---|---|---|
Nipple rubs painfully against tunnel walls |
Tunnel may be too narrow |
Stop and reassess size |
Excessive surrounding tissue enters the tunnel |
Tunnel may be too wide |
Review positioning and size |
Swelling or discomfort develops |
Fit or suction may need adjustment |
Stop and review both |
Nipple moves freely without painful rubbing |
Fit may be suitable |
Continue monitoring comfort |
These observations help start a fit discussion; they do not diagnose the cause of pain. Manufacturer guidance describes free nipple movement and limited areola entry as useful fit checks. Persistent discomfort deserves professional assessment.
Change one factor at a time when checking equipment. For example, centre the nipple before trying another size. Otherwise, you may struggle to identify which adjustment mattered.
Keep brief notes rather than relying on memory. Record the side, flange size, suction setting, and point when discomfort began. Share those details during a consultation.
Avoid repeatedly buying sizes without reviewing how you position the flange. Also avoid increasing suction to compensate for an uncomfortable fit. The breast pump should not cause ongoing pain.
Comfort deserves attention even when breast milk flows. Do not treat visible collection as proof that every setting is suitable. Your experience during the whole session matters, not only the amount collected.
Start your breast pump gently
Read the complete manual before the first session. Assemble the equipment exactly as shown, using the correct components. Find a clean, comfortable place where you can reach the controls easily.
For an electric breast pump, begin with the lowest suction setting. Increase gradually only while comfortable and within the manufacturer’s instructions. Starting with strong suction can cause pain or nipple damage.
For a manual breast pump, begin with gentle handle movements. Follow the model’s instructions for rhythm and operation. Avoid assuming that a harder squeeze makes a session better.
A simple session setup includes:
A comfortable seat with room for your equipment.
Clean, dry parts assembled according to the manual.
Easy access to power or the manual handle.
A clean surface for components you need nearby.
A clear plan for storing expressed breast milk afterward.
Enough time to clean the kit without rushing.
Keep the manual nearby during early sessions. Learn the stop control before experimenting with other settings. If someone helps, show them how to switch the equipment off.
Ask your care team for a pumping schedule suited to your situation. Session frequency and duration depend on why you express. Avoid copying another person’s timetable without discussing your needs.
One breast may produce a different amount from the other. That difference alone does not establish a device problem. Discuss concerns alongside comfort, your routine, and your baby’s needs.
Separate equipment questions from schedule questions in your notes. Customer support can explain assembly or controls. A lactation professional can help assess pumping difficulties and your expressing plan.
Do not keep increasing settings while trying to troubleshoot. Pause, inspect the setup, and decide what needs checking. A calm review is more useful than changing several controls together.
Breast pump usage and hygiene: the basics
Use this plain checklist as a shared reference at home. Keep the full manual beside it for model-specific details. Your maternity or neonatal team may give stricter instructions for your baby.
Wash milk-contact parts with dish soap and warm water after every use, then rinse and air-dry.
Follow manufacturer instructions for sanitising, especially for newborns, premature babies, or babies with weakened immunity.
Discard mouldy components and replace damaged parts before using the kit again.
Discard contaminated tubing containing milk or mould; contact the manufacturer if contamination may have reached the motor.
Never share a personal pump, even when another person offers their own accessories.
Measure only the nipple; choose a slightly larger flange using the correct manufacturer’s chart.
Ask a lactation consultant about ongoing pain after changing flange size.
Start electric pumps on the lowest suction setting and increase only while comfortable.
Remember that manual pumps are generally slower and quieter than electric pumps.
Divide household tasks clearly if someone helps with rinsing. One person can wash while another prepares the drying area. Everyone should follow the same instructions rather than using different shortcuts.
How do I clean breast pump parts after each use?
After each use, separate milk-contact parts and wash them with dish soap and warm water. Rinse thoroughly, then leave them to air-dry on a clean surface. Check the manual before washing tubing, powered components, or any part with special cleaning instructions.
Prepare a dedicated wash basin and brush for the kit. Do not place pump pieces directly in the kitchen sink. Wash promptly so breast milk residue does not dry onto the surfaces.
Use this sequence for handwashing:
Wash your hands before handling the used equipment.
Separate each washable part according to the manual.
Rinse away visible breast milk residue with safe running water.
Fill the dedicated basin with warm water and dish soap.
Wash each piece, including connectors and small washable components.
Use the dedicated brush where the instructions allow.
Rinse thoroughly until no soap remains.
Place parts apart for air-drying.
This sequence reflects pump-washing guidance from hospital and manufacturer instructions. Your model may need additional steps for particular components. Check its diagrams before removing small membranes or seals.
Check each piece as you wash. Look for milk trapped around joins, corners, or removable seals. If you cannot identify a component, pause and consult the parts diagram.
Some breast pump parts allow dishwasher cleaning, but not every component does. Confirm compatibility and placement in the manual before using that method. Keep small pieces secure so they cannot disappear during the cycle.
Never immerse the motor unit or power adapter. Clean powered surfaces using the method specified by the manufacturer. Keep electrical rinsing separate from washing the milk-contact kit.
If you have help, demonstrate the full washing sequence once. Point out the small pieces and where each one belongs. Leave enough space to inspect the kit before reassembly.
Air-dry breast pump parts before storage
How should I dry breast pump parts after washing? Place separated parts on clean, unused paper towel or a clean drying surface. Let them air-dry fully, without rubbing them with a household tea towel.
Leave space between pieces instead of stacking them. Choose an area away from splashes, dust, and routine kitchen work. Clean storage starts with a drying arrangement that does not crowd everything together.
Do not close damp pieces inside a storage box. Wait until they dry completely before assembling or putting them away. Use clean hands when handling the dry kit.
A drying area does not need to look elaborate. It needs enough room for the separated components and a clear boundary. Tell other household members that this space is for the kit.
Try these practical arrangements:
Choose one drying location instead of moving parts between several surfaces.
Keep the parts diagram nearby while learning the kit.
Place small pieces where you can see them easily.
Keep used equipment away from the clean drying area.
Check for trapped droplets before closing the storage container.
If parts take longer to dry in humid weather, allow more preparation time. Do not solve the problem by packing them while damp. Consider whether a compatible spare kit would make your routine easier.
A spare kit still needs full washing and drying after use. Label your storage spaces rather than marking milk-contact surfaces. Keep a clear distinction between ready-to-use parts and parts awaiting cleaning.
Do you need to sanitise breast pump parts every day?
Do I need to sterilise breast pump parts every day? Health guidance recommends daily sanitising for extra protection, especially for babies under two months, premature babies, or weakened immunity. Older, healthy babies may not need daily sanitising when you clean parts carefully after every use.
Follow your manufacturer’s instructions and your baby’s clinical team. Some hospital guidance uses a stricter washing and sterilising routine. Ask which routine applies before leaving hospital, particularly after neonatal care.
Cleaning and sanitising serve different purposes. Rinsing removes breast milk residue and dirt. Sanitising adds germ reduction after cleaning; it does not replace washing.
How can I sanitise breast pump parts at home? Use a manufacturer-approved steam or boiling method after washing compatible parts. Follow the specified timing, then allow the parts to air-dry completely.
Do not assume that every component tolerates boiling or steam. Manufacturers give different instructions for different materials and designs. Read the instructions for the complete kit, not just the sanitising appliance.
Before starting, check:
Which parts can tolerate your chosen method.
Whether each part needs further separation.
How much water the equipment requires.
The exact cycle or treatment time.
How to remove hot parts safely.
Where the parts will air-dry afterward.
Keep the relevant instructions beside your washing station. Ask a helper to follow those written steps rather than estimate the timing. Avoid mixing directions from several unrelated products.
Household products may use “steriliser” on their packaging. Regulators note that some microwave products do not meet the technical definition of sterilisation. For home use, follow the approved reprocessing instructions rather than relying on the product name alone.
Inspect breast pump tubing and replace contaminated parts
Does the breast pump tubing need washing too? Usually, tubing needs no routine washing when it never contacts breast milk. Follow your exact model’s instructions because tubing care differs between designs.
Inspect the tubing before assembling your kit. Look for milk, mould, trapped moisture, and visible damage. Do not treat a blocked or contaminated tube as a reason to increase suction.
Condensation and breast milk contamination need different responses. Some instructions allow running the motor briefly to dry condensation. Other models prohibit running with wet tubing, so never apply that advice without checking.
Use this distinction:
Tubing condition |
Action |
|---|---|
Clean and dry |
Follow normal assembly instructions |
Clear condensation |
Follow the model’s specific drying directions |
Breast milk or other contamination inside |
Stop using it and replace contaminated tubing |
Visible mould |
Discard and replace immediately |
Cracks or damaged connections |
Obtain compatible replacement tubing |
These actions depend on inspection and manufacturer guidance. Contact support if milk appears near the motor connection. Do not dismantle the powered unit to investigate internal contamination yourself.
Discard mouldy or damaged milk-contact components rather than returning them to normal use. Check valves and membranes for tears or distortion during inspection. Damaged components can also interfere with suction.
Keep a photograph of the replacement part number. When contacting support, describe where you found moisture or contamination. Clear descriptions help distinguish a tubing question from a motor problem.
After replacing a part, review assembly before restarting. Check that every connector matches the model and sits correctly. Do not combine similar-looking components without confirming compatibility.
Is it safe to share a breast pump?
Is it safe to share a breast pump with someone else? Never share a breast pump designed for personal, single-user use. Sharing remains unsafe even when another person replaces the external collection kit.
A different rule applies to equipment specifically designed for multiple users. Use such equipment only through an appropriate service and with the required personal kit. Ask the provider to explain cleaning, handling, and permitted use.
Do not assume that “hospital-grade” automatically means suitable for sharing. Regulators note that this term has no consistent recognised definition. Check the manufacturer’s actual multi-user designation instead.
Before accepting a loan or rental, ask:
Does the manufacturer explicitly permit multiple users?
Who prepares and maintains the shared equipment?
Which parts must remain personal to each user?
Where are the written rinsing instructions?
Who should you contact if breast milk enters an unexpected area?
These questions also help families avoid confusing a personal pump with rental equipment. A relative’s careful cleaning does not change a single-user designation. If the permitted use remains unclear, do not share it.
Keep your personal kit clearly separated from anyone else’s equipment. Explain the single-user rule before lending or borrowing becomes an urgent request. A clear boundary prevents difficult decisions during a rushed session.
Store breast milk safely after pumping
How should I store expressed breast milk safely? Transfer expressed breast milk into clean, food-grade containers or purpose-made breast milk storage bags, then seal and label them. Refrigerate promptly, especially in a warm Indian home.
Safe storage times and temperatures depend on your baby’s age and health. Premature or unwell babies may need different instructions from their clinical team. Ask your doctor or lactation consultant for the storage chart that suits your baby, and keep it beside the refrigerator.
Make prompt cooling part of your pumping setup. Choose your storage location before starting the session.
Label each portion with the expressing date and time. Keep breast milk inside the refrigerator rather than in its door. Use older portions first.
For travel, use an insulated cooler with frozen ice packs, then refrigerate or use the milk at your destination. Ask your clinical team how long travel storage is suitable for your baby. Plan this step before leaving home.
Ask your clinical team how to thaw and warm stored breast milk and how long thawed breast milk can be kept. Do not use a microwave for thawing or warming. Do not refreeze thawed milk unless your clinician says it is suitable.
If combining portions, cool fresh breast milk before adding it to previously cooled breast milk. Base the storage deadline on the oldest portion. Keep labels clear enough that another caregiver can follow them.
During power cuts, keep refrigerator and freezer doors closed as much as possible. Ask your clinical team whether affected milk remains suitable. Do not judge storage safety through appearance alone.
Make a simple household handover note for expressed milk. Include where you placed it and which portion comes first. This turns safe storage into a shared routine rather than one person’s memory task.
Build a manageable breast pump cleaning routine
Organise your routine around three stages: ready, used, and drying. Give each stage its own place. This prevents uncertainty about which pieces need attention.
A small home station can include the manual, dedicated basin, washing brush, and a protected storage area. Keep used pieces separate from dry equipment. Choose supplies based on the actual kit rather than a long shopping list.
Consider this practical sequence:
Before pumping, check that the complete dry kit is ready.
Prepare your breast milk storage container and label.
After pumping, secure the breast milk and arrange cooling.
Move used washable parts to the cleaning area.
Wash, rinse, and set them out for air-drying.
Return fully dry components to their clean storage place.
This planning sequence supports the rinsing and storage steps described earlier. It is not a substitute for the manufacturer’s instructions. Adjust the organisation around your home, not around someone else’s photograph.
If a family member helps, agree on a complete task. “Wash the kit” should include separating, washing, rinsing, and arranging drying. It should not mean leaving several hidden components for you to inspect later.
For work or travel, prepare separate clean and used-part spaces. Pack the instructions or save them on your phone. Include a realistic plan for washing and drying before the next session.
Do not assume that chilling used parts replaces cleaning. Health guidance notes that refrigeration slows bacterial growth but does not stop it. Washing after every use remains the safest approach, especially for vulnerable babies.
If time is your main difficulty, review the workflow before buying another pump. Identify whether assembly, washing, drying, or carrying causes the delay. A compatible spare kit may address a different problem from a faster motor.
Review your arrangement after several ordinary days. Move frequently needed items within reach and remove unnecessary clutter. Keep the safety steps unchanged while simplifying the surrounding tasks.
Get help with breast pump pain or persistent problems
When should I ask a lactation consultant for help? Ask when pumping causes ongoing pain, flange uncertainty, or difficulties that persist after basic checks. Seek help particularly when changing flange size does not resolve discomfort.
Do not wait for severe pain before asking. A consultation can focus on positioning, sizing, suction, and your expressing routine. Bring the actual kit if the service allows it.
Prepare a short record beforehand:
Pump model and the components you currently use.
Nipple measurements and the chart used for sizing.
Flange size for each side.
Suction settings and recent adjustments.
When pain starts and how it feels.
Any visible rubbing, swelling, cracks, or bleeding.
Assembly problems or recent replacement parts.
Ask the consultant to watch a session when appropriate. Describe discomfort clearly rather than saying only that the unit feels wrong. Explain which adjustments you already tried.
Persistent pain, injury, or bleeding also needs advice from a doctor or another qualified healthcare professional. Contact the manufacturer for equipment faults rather than trying to repair the motor yourself.
Seek prompt medical care for a hot, painful breast with fever or flu-like symptoms. These symptoms need assessment beyond flange shopping or suction changes. Do not try to manage worsening symptoms by increasing pump strength.
Separate urgent concerns from routine troubleshooting. Tell the professional about symptoms first, then describe equipment details. Keep the manual available so they can understand your model’s controls.
You do not need a perfect record before seeking help. A clear description of pain and your current setup is enough to start. Ask for a practical plan you can follow at home.
Keep your breast pump routine comfortable and clear
Choose equipment around your actual expressing needs, then check flange fit during gentle use. Wash milk-contact parts after every session and let them air-dry fully. Follow the correct sanitising instructions for your equipment and your baby’s needs.
Keep the routine understandable for everyone who helps. Store the manual where you clean, separate used and dry parts, and label expressed breast milk clearly. Review problems early instead of repeatedly changing sizes or settings without support.
Your next step can stay simple. Check today’s kit, identify one unclear instruction, and get the right answer before your next session. A manageable routine should leave less guesswork around equipment, hygiene, and comfort.
Explore Medical Collections
All Categories
Abdominal Belt: Support After Surgery, in Pregnancy and After Delivery

Accessories
Accu-Chek Instant Strips: Use, Compatibility, Price & Blood Sugar Testing Guide
Accu-Chek Instant Strips: Uses, Features & Complete Guide

accupuncture

Acupuncture Needles & Supplies

Advanced Physiotherapy Machines & Lumbar Physiotherapy
AED Defibrillator: How It Works, Who Can Use It and Where to Place It

Airways
Alcohol Swab: Uses, Safe Use and Disposal Guide
Ambu Bag Full Form: Is There an Official Meaning?
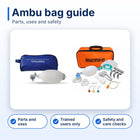
Ambu Bag: Parts, Uses and Safety Guide
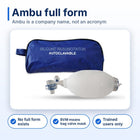
Ambu Full Form: What the Name Means and BVM Basics

Ambulance

Anatomy Models
You may also need
FOR YOURecommended for you
Save 37%
Save 36%