


Featured ChoiceSave 25%
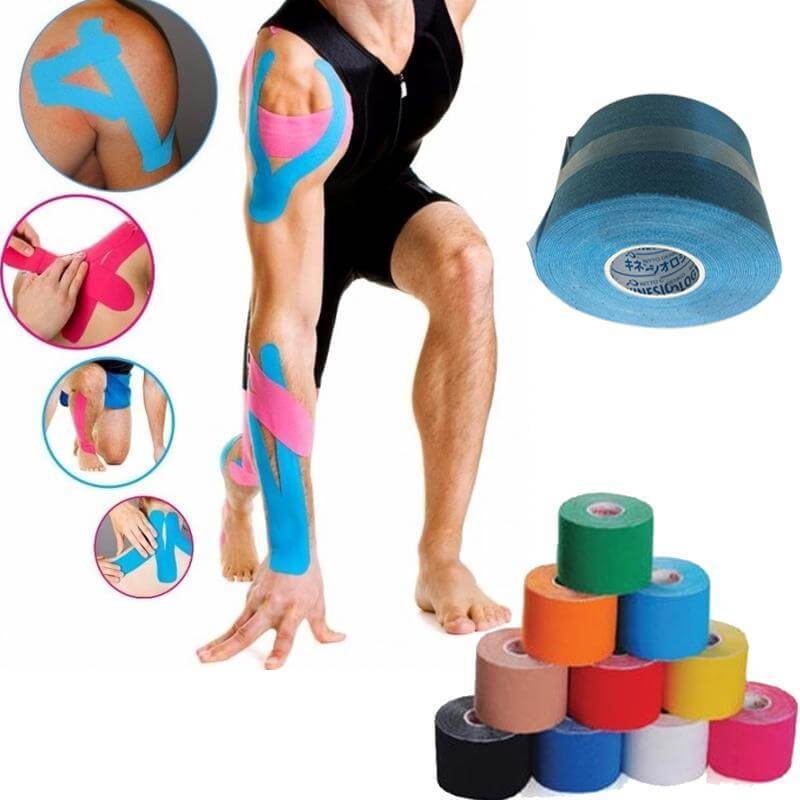
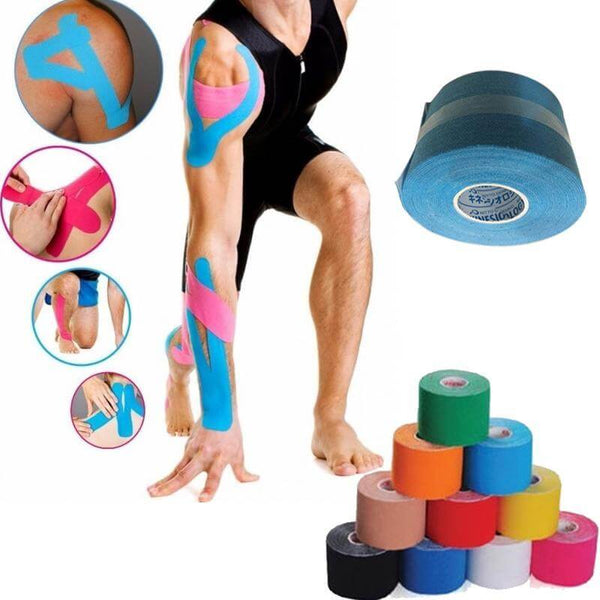
Kinesiology tape: does it work and how to apply it safely

Kinesiology tape is a stretchy adhesive material that may offer temporary comfort or movement awareness for some people. Research does not show reliable benefits for every problem, and skin irritation remains an important risk. This article explains realistic expectations, home application, skin checks, showering, and gentle removal. Use it only as support alongside suitable rest and exercise, never as a cure.
What is kinesiology tape?
Kinesiology tape is flexible material that sticks directly to the body while allowing movement. People use it to provide a gentle sensory cue around a muscle or joint. It does not form a hard support or hold damaged tissue together.
You may hear people call it k tape, kt tape, or physio tape. These everyday search terms often refer to elastic strips, although individual materials and instructions can differ. Always check the information supplied with your kinesiology product.
The sensation of wearing it may make you more aware of movement. Some users describe feeling supported, but that feeling does not prove greater joint stability. Soft, stretchy kinesiology material cannot offer the same restraint as a firm support.
For home use, start with a clear purpose. Perhaps a practitioner has shown you a kinesiology pattern for a particular movement. That gives you something specific to assess, rather than simply covering a painful area.
Think of it as an optional addition, not an essential purchase. If you cannot identify a useful purpose, there is no need to apply it. Visible use by athletes does not establish a benefit for your needs.

Does kinesiology tape really work?
Kinesiology tape may provide short-term benefits for certain symptoms, but the evidence remains mixed and condition-specific. It does not reliably improve every painful area, strengthen muscles, or speed recovery. Feeling better while wearing it does not establish that an injury has healed.
A Cochrane review examined its use for rotator cuff disease, a group of shoulder problems. Researchers found very uncertain evidence about several outcomes, including pain and function. They could not draw confident conclusions about its benefits and harms.
A clinical guideline allows clinicians to consider it as an addition to active rehabilitation for short-term shoulder pain. However, it also describes uncertainty in the evidence. That is a limited option, not proof that it works for all conditions.
For home users, separate three different questions:
-
Does it feel comfortable? This tells you about your immediate experience, not tissue healing.
-
Does an ordinary task feel easier? This gives you a practical observation to discuss with your practitioner.
-
Does it produce lasting improvement? One comfortable afternoon cannot answer this question.
Avoid turning a small change into a broad conclusion. For example, easier movement during one household task does not establish readiness for a demanding activity.
You also do not need to keep using it because someone else found it helpful. Record your own experience and stop if there is no clear value. An optional support should earn its place through usefulness, not habit.
Why kinesiology tape is support, not a cure
Use kinesiology tape only as a support tool alongside appropriate rest and exercise. It is not a cure. It cannot replace an assessment, establish a diagnosis, or prove that a painful area can tolerate extra activity.
Keep your usual activity limits unless a qualified practitioner advises otherwise. Do not add extra repetitions, heavier lifting, or longer walks simply because the covered area feels different.
A useful boundary is straightforward: judge the activity on its own merits. Ask whether you could reasonably attempt it without relying on the kinesiology tape for reassurance.
For example, wearing it during an already suitable activity differs from using it to push through worsening discomfort. The first treats it as an optional aid. The second gives it responsibility it cannot safely carry.
Before application, write down your aim in one sentence. Keep that aim modest, such as observing comfort during an ordinary, already permitted task. Avoid goals such as curing pain, correcting your body permanently, or preventing every future problem.
How kinesiology tape differs from rigid sports tape
The main difference is stretch. Kinesiology tape allows movement, while rigid sports tape aims to restrict particular movements when appropriately applied. They are not interchangeable simply because both stick to the body.
For someone using elastic strips at home, this distinction prevents a common mistake. Pulling stretchy kinesiology material tighter does not safely turn it into rigid support. Excessive tension can instead create discomfort and irritation.
|
Feature |
What to expect from kinesiology tape |
|---|---|
|
Stretch |
Flexible material that moves with the body |
|
Main practical role |
An optional sensory cue or comfort aid |
|
Firm restraint |
Not a reliable substitute for rigid support |
|
Application |
Placement and tension should match individual guidance |
|
Safety checks |
Skin comfort, normal sensation, and normal colour remain essential |
These expectations follow clinical descriptions and patient guidance. They do not establish that any application will help you.
Avoid copying a rigid wrapping pattern using elastic kinesiology material. In particular, do not improvise a tight ring around a limb. If you need movement restriction, ask a practitioner whether kinesiology taping suits that purpose at all.

Who should avoid kinesiology tape at home
Do not apply kinesiology tape over open wounds, broken skin, active irritation, or very fragile skin. Adhesive removal can damage vulnerable skin, and reactions may include irritation, blisters, or allergy. Previous adhesive reactions deserve particular caution.
Seek individual advice before using kinesiology tape if you have diabetes, fragile or healing skin, or other relevant health conditions. A hospital leaflet also lists pregnancy, kidney disease, and heart failure as situations requiring precautions. These are reasons for assessment, not a universal declaration that everyone with these conditions must avoid it.
Do not use a home patch test to override an existing allergy diagnosis. If you previously developed a strong reaction, discuss that history before another attempt.
Consider whether you can monitor and remove the material safely. A kinesiology strip you cannot see or reach creates practical difficulties. Arrange suitable help rather than relying on guesswork.
Tell your practitioner about previous reactions, even if they happened with a different adhesive. Also mention any reduced sensation. You need to recognise discomfort promptly, rather than discover a problem only after removal.
If you feel unsure about it, pause. There is no need to apply it while waiting for advice.
How do I do a forearm patch test first?
Before a first application, test a small piece on healthy forearm skin. This checks your initial tolerance without covering a large area. However, a home test cannot rule out every later reaction or diagnose an adhesive allergy.
Follow the testing instructions supplied with your kinesiology pack or provided by your practitioner. Do not invent a shorter testing period because you want to apply it immediately.
Use this simple process:
-
Choose a healthy forearm area without scratches, rash, or irritation.
-
Clean the skin and let it dry completely.
-
Apply a small piece without stretching it.
-
Watch for itching, burning, swelling, discomfort, or a new rash.
-
Remove it immediately if symptoms appear.
-
Check the area after removal for a delayed reaction.
Forearm testing and removal for itching are recommended in clinical patient advice. Allergic reactions can develop later, so an early clear result offers no guarantee.
Keep the test simple. Do not test several unfamiliar products in the same area at once. If something reacts, knowing what touched the area helps the discussion with your doctor.
A small test also gives you a chance to practise gentle removal. Notice whether the area feels comfortable afterwards, not merely whether the piece stayed attached.
If reactions recur, ask about professional allergy assessment. A dermatologist's patch testing differs from this basic home tolerance check.

How to prepare before applying a kinesiology strip
Start with clean, dry skin. Keep the application area free from moisturiser, massage oil, and creams. These can interfere with adhesion, so adding extra stretch is not the answer when the surface feels slippery.
Check the whole area before cutting anything. Look for scratches, rashes, tender patches, or places where clothing already rubs. Choose not to apply kinesiology tape if the area looks or feels irritated.
Set out your kinesiology material, clean scissors, and the application guidance you received. Sit somewhere comfortable, with enough light to see the area clearly. Rushing while standing awkwardly makes accurate placement harder.
If body hair affects application, ask about careful trimming. Avoid creating fresh irritation merely to make the surface smoother. Any preparation should leave the skin healthy, not sore.
Practise reaching the area before removing the backing. Can you keep the required position comfortably? Can you see the ends and reach them later for removal?
For areas that are difficult to reach, ask someone to help after you receive clear guidance. Explain the stop signs before starting. Your helper should understand that discomfort means pausing, not pulling harder.
Leave enough time to check the result before dressing or leaving home. Applying it should not become a last-minute task before a busy commute.
How do I apply kinesiology tape at home?
Apply kinesiology tape at home only after learning a suitable pattern for your needs. Prepare healthy skin, use the demonstrated position and tension, and leave the ends unstretched. There is no single safe pattern that suits every body area or cause of pain.
Use these general steps alongside individual guidance:
-
Confirm the purpose. Know the area, intended benefit, and circumstances in which you should avoid application.
-
Check your skin. Do not cover broken, fragile, itchy, or irritated areas.
-
Complete the forearm tolerance check. Do not proceed after a reaction.
-
Measure before peeling. Prepare the length and shape your practitioner demonstrated.
-
Round the corners. Smooth corners are less likely to catch than sharp ones.
-
Adopt the demonstrated position. Do not force a painful stretch to copy a picture.
-
Apply the first end without stretch. Keep this anchor comfortable against the body.
-
Lay the middle as instructed. Do not guess the tension or assume stronger pulling creates better support.
-
Finish without stretching the final end. Smooth it into place without dragging the skin.
-
Check comfort during gentle movement. Remove the kinesiology strip if it worsens symptoms or creates unusual sensations.
Hospital instructions emphasise individual patterns, unstretched anchors, prescribed tension, and removal when symptoms worsen. Patch testing adds a separate safety check before wider use.

Ask your practitioner to watch your first attempt if possible. Explain each step as you do it. This makes misunderstandings easier to identify than simply saying you understand.
Do not add extra layers to rescue uncertain placement. If the application differs from what you learned, stop and ask for clarification.
Keep a written note of the starting point, ending point, body position, and tension advice. With permission, a reference photo of your demonstrated application may help. It should record personal guidance, not replace it.
Finally, check that you can remove the material yourself or have suitable help available.
How much should you stretch a kinesiology strip?
More tension does not automatically mean more benefit. Clinical kinesiology tape instructions distinguish the unstretched ends from any advised stretch through the middle. They leave the amount of stretch to individual guidance, rather than offering one universal setting.
That matters when following a demonstration. Two kinesiology patterns can look similar while using different tension. Judging only by appearance may miss the important detail.
If someone tells you to use “light stretch”, ask them to demonstrate it with your material. Then repeat the movement while they watch. A practical check is more useful than pretending the wording feels clear.
Do not keep pulling until the area feels firmly gripped. Elastic kinesiology material should not become an improvised tight wrap. A loss of normal skin colour, tingling, or numbness requires immediate removal.
Avoid repeatedly pressing or stretching an uncomfortable application to make it settle. Remove it gently and review the technique instead.
Your aim is to reproduce the guidance you received. It is not to create the strongest possible sensation against your body.

Why learn a kinesiology pattern from a practitioner?
Self-applied kinesiology tape generally produces weaker results than skilled application, according to Hospital for Special Surgery patient guidance. Its specialist explains that anatomy, the underlying problem, and technique affect application. This is clinical advice, not a guaranteed improvement of a measured size.
Professional application still cannot overcome uncertain evidence or guarantee relief. Its practical value includes checking suitability and teaching you how to avoid obvious mistakes.
Use a teaching session to ask specific questions:
-
Where should each end sit on my body?
-
What position should I maintain during application?
-
Should the middle section stretch at all?
-
Which sensations mean I should remove it?
-
How should I remove this strip from this area?
Ask the practitioner to correct your attempt rather than only demonstrate their own. Watching a skilled person work can make a task appear easier than it feels later.
If you cannot reproduce the pattern comfortably, say so. A simpler approach, assistance, or deciding against home application may be more sensible than repeated unsuccessful attempts.
What should you check while the tape is on?
Check the kinesiology strip after putting it on and during ordinary daily activities. Pay attention to your skin, normal sensation, and comfort during movement. Remove it if symptoms worsen, movement becomes harder, or an adverse skin reaction develops.
Use this table to distinguish routine monitoring from a reason to stop:
|
What you notice |
What to do |
|---|---|
|
Comfortable skin and ordinary movement |
Continue monitoring within the instructions you received |
|
Itching, burning, rash, swelling, or blisters |
Remove immediately and gently |
|
More pain or harder movement |
Remove and discuss the response with your practitioner |
|
Numbness, tingling, or unusual skin colour |
Remove immediately; seek prompt assessment if symptoms persist |
|
Loose material catching on clothing |
Stop and assess whether safe removal is needed |
|
Severe or persistent skin symptoms |
Contact a doctor |
Patient leaflets support these stop signs and advise medical help for severe or persistent reactions.
Do not rely only on how the surface looks. Ask yourself whether the covered area feels different from before application.
Before leaving home, make sure you could manage removal if necessary. Wearing it somewhere difficult to reach deserves extra planning. If you depend on another person, agree how you will get help rather than waiting until discomfort develops.
How long can the tape stay on?
There is no single wear time that is right for everyone. Personal tolerance, the application, and the instructions you received all matter. Treat any skin reaction as an immediate wearing limit, even if you expected to keep it on longer.
Do not aim for a fixed number of days. Staying attached does not mean the kinesiology tape remains comfortable or useful. Equally, a comfortable patch does not justify ignoring the removal limit supplied with it.
Use two boundaries together: follow the stated instructions and remove sooner if you notice a reaction. Never extend wear simply because you want better value from the kinesiology material.
Plan around access to gentle removal. If you will be away from home, consider whether you can inspect the area and obtain help if needed.
Check underneath clothing rather than assuming everything remains fine. Pay particular attention when you notice a new sensation or a change in comfort.
You can also choose to remove an application because it serves no useful purpose. You do not need to wait for irritation or for an edge to lift.
The practical question is not how long it can possibly stay attached. It is whether continued wear remains comfortable, appropriate, and within your guidance.
Can you shower with kinesiology tape on?
You can usually shower with kinesiology tape on when its instructions allow water exposure. After washing, gently pat it dry and let it air-dry. Avoid rubbing it firmly or using a hairdryer.
Water resistance does not mean every piece will remain unchanged. Hand-applied pieces may loosen sooner because of frequent washing and use. Check the edges and your comfort afterwards.
Keep the routine simple. Wash normally without scrubbing across the tape. When drying, use gentle pressure rather than dragging a towel over the edges.
If a piece becomes uncomfortable after bathing, do not keep it on merely because showering was permitted. Water exposure and comfortable wear are separate questions.
A shower can also help prepare for removal by softening the adhesive. However, do not delay removing an itchy application until your usual bathing time. Start gentle removal promptly.
For home users, planning matters more than chasing perfect adhesion. Apply only when you have time to observe the result. Avoid treating a loose edge as a reason to add another layer without checking the area first.
Wearing kinesiology tape in hot weather and busy days
In hot Indian weather, build regular checks into your routine rather than relying on a wear-time promise. Check after a sweaty commute, household work, or other activities. The purpose is observation, not keeping the material attached at all costs.
Apply kinesiology tape to dry skin and follow its instructions about activity afterwards. Some patient guidance advises avoiding immediate sweating so the adhesive can settle.
Choose clothing that lets you inspect the area without difficulty. If a sleeve or trouser seam catches an edge, pause and check it. Do not keep tugging the clothing across the same spot.
Think ahead if you will spend the day away from home. Know where you could wash your hands and remove the kinesiology tape gently.
Avoid testing an unfamiliar pattern just before a long journey or important event. Give yourself a chance to notice discomfort and ask questions first.
A workable routine should make monitoring easy. If wearing it creates more inconvenience than benefit, choosing not to use it remains reasonable.
What to do if the tape itches
If your skin itches under kinesiology tape, remove it immediately and gently. Do not scratch through it or wait to see whether the sensation becomes stronger. Itching, burning, swelling, redness, and blisters can signal an adverse skin reaction.
You do not need to decide whether the cause is irritation or allergy before removing it. That distinction may need professional assessment. Your immediate priority is to stop the contact without causing damage.
Do not apply cream beneath a lifted edge and press it back down. Do not place another piece over the itchy area. Leave the affected skin uncovered after gentle cleaning.
Contact a doctor if symptoms are severe, persistent, or worsening. Get urgent medical help if a reaction includes breathing difficulty or facial swelling.
Note when the symptoms started and what touched the area. Keep the material information available for your doctor. A clear record can be more useful than trying several different patterns afterwards.
Feeling itchy does not mean the material is working. Nor should you treat it as a normal adjustment period. Your body's response takes priority over your planned activity and expected wearing time.
How to remove the tape gently
To remove kinesiology tape gently, soften it with water or a skin-friendly oil, then peel slowly. Hold the nearby skin with your other hand. Keep the kinesiology material close to the body instead of pulling it sharply upwards.
Use this careful sequence:
-
Stop the activity. Sit somewhere stable and expose the whole application.
-
Soften the adhesive. Soak it during washing or apply a little suitable oil.
-
Lift one edge gently. Avoid digging at it with your nails.
-
Support the skin. Place your free hand close to the peeling edge.
-
Peel back slowly. Fold the material back towards itself rather than lifting away from the body.
-
Follow hair growth where possible. This can make removal more comfortable.
-
Pause if it pulls. Add gentle softening rather than using more force.
-
Clean afterwards. Wash away residue gently and pat the area dry.
Patient advice recommends water or oil, slow removal, skin support, and following hair growth. It specifically warns against tearing the material off quickly.
If itching prompted removal, begin straight away. Do not interpret “remove immediately” as an instruction to rip it off. Prompt action and gentle technique belong together.
For an area you cannot reach, ask for help. Tell the helper to stop whenever you feel painful pulling.
If removal causes skin damage or the material will not come away without significant pain, seek help. Do not continue pulling simply to finish the task.

What to do after removal
After removal, gently wash away leftover adhesive and pat the area dry. Check for tenderness, rash, swelling, or blisters. Do not reapply over irritated skin; allow the reaction to resolve and seek advice when needed.
Avoid scrubbing to remove every trace of stickiness at once. Your aim is comfortable, intact skin, not a perfectly clean surface achieved through friction.
Look again later if the area feels itchy or sore. A reaction may appear after the initial contact, so an immediate check cannot answer everything.
If you develop blisters or broken skin, stop further application and contact a healthcare professional. Do not cover the reaction with more kinesiology material.
Use the experience to review your approach. Consider whether removal felt rushed, the placement differed from guidance, or symptoms developed during wear.
Take these observations to your practitioner without blaming yourself. An adverse reaction does not mean you failed to apply it carefully. Sometimes the sensible next step is avoiding further use rather than trying harder.
Does the colour of kinesiology tape matter?
The colour of kinesiology tape does not affect its efficacy. A controlled study in healthy adults found no colour-related improvement in performance, strength, or neuromuscular function. Colour therefore offers no sound basis for expecting stronger results.
Choose a shade according to personal preference, not a supposed effect on muscles. A bright colour does not establish greater support. A skin-toned colour does not make an application clinically different.
However, colour and material are separate matters. Different kinesiology products may have different instructions or adhesive ingredients. Do not assume that two differently labelled kinesiology materials are identical because their shades match.
Keep attention on more useful details: skin tolerance, clear guidance, and whether the application serves a purpose. These questions matter more than matching an athlete's appearance.
If you previously reacted, changing colour alone is not a reliable safety strategy. Discuss the reaction and the material information with a qualified practitioner before another attempt.
What to read on a kinesiology product label
Before using kinesiology tape rolls, read the application and safety information. Check the stated materials, warnings, water-exposure advice, and removal guidance. If anything conflicts with what you remember, ask your practitioner to clarify before applying it.

Do not let reassuring wording replace a careful check. Descriptions such as latex-free do not guarantee freedom from irritation or allergy. Reactions can still occur.
Keep the packaging until you know how your body responds. It gives you the material details if you need advice later.
Treat an application example as guidance that may need adapting, not a diagnosis. A picture showing the knee or shoulder cannot identify why your own area hurts.
If instructions depend on a particular tension or body position, make sure you understand those details. Ask for a demonstration rather than substituting your own interpretation.
You do not need a complicated selection process or promises of superior results. Clear information and suitability for your circumstances are more useful starting points than dramatic claims.

How can you tell if it is worth using?
Decide what useful change you want to observe before application. Keep the task ordinary and already appropriate for you. This makes your observations easier to interpret than testing several unfamiliar activities at once.
For example, you could note comfort during an approved movement or a normal household task. Record how it felt before application, while wearing it, and after removal. Do not turn the comparison into a challenge to tolerate more discomfort.
A short note might include:
-
The kinesiology pattern your practitioner taught you.
-
The everyday task you wanted to observe.
-
Any change in comfort or movement.
-
Any skin symptoms during wear.
-
Whether removal felt comfortable.
-
Whether the practical benefit justified another discussion about use.
These notes organise your experience; they do not prove effectiveness. Research findings remain uncertain, and a personal response cannot establish healing or long-term benefit.
If you notice no meaningful difference, say so. You do not owe the method repeated attempts because it looks professional or feels popular.
If you notice a benefit, keep the conclusion narrow. “This task felt easier today” is more accurate than “this cured the problem”. Share the observation with your practitioner before changing activity limits.
When to see a doctor instead of kinesiology tape
Kinesiology tape cannot replace a doctor visit for a serious injury. It cannot identify a fracture or explain severe swelling, deformity, or loss of sensation. Feeling temporarily supported does not make those signs safe to ignore.
Seek prompt medical assessment if you have severe or worsening pain, substantial swelling, or difficulty bearing weight. An obviously changed shape, a cold or unusually coloured limb, or new numbness needs urgent attention.
Do not delay assessment to test another pattern. Remove an uncomfortable kinesiology strip gently, but seek urgent help without spending time perfecting removal when symptoms are serious.
This boundary also applies when pain keeps returning without a clear explanation. Repeatedly covering the same area may create a routine without answering the underlying question.
When discussing symptoms, explain where you applied the material and whether it changed anything. Mention any new reaction separately from the original discomfort. This helps the clinician understand what happened before and after application.
Home use should begin with reasonable confidence that it is appropriate. If the situation seems serious or uncertain, a doctor visit comes first. The decision to seek help does not depend on whether the kinesiology tape feels supportive.
Common kinesiology tape mistakes to avoid at home
Several avoidable habits can make home application less useful. Review your process rather than assuming every disappointing result needs a different pattern.
-
Copying someone else's placement: A similar-looking painful area does not establish the same problem or suitable application.
-
Using extra stretch for reassurance: Follow demonstrated tension instead of trying to create a tighter grip.
-
Skipping safety checks: Comfort and normal sensation matter throughout wear, not only during application.
-
Treating itching as harmless: Remove promptly rather than scratching or waiting.
-
Rushing removal: Soften, support the skin, and peel slowly.
-
Reapplying over a reaction: Let affected skin recover and seek advice when appropriate.
These cautions reflect clinical guidance on individual technique, adverse reactions, and careful removal.
One disappointing attempt does not prove that you need more material or stronger tension. It may mean the application needs review, your skin cannot tolerate it, or it offers little value for you.
Your kinesiology tape safety checklist
Before each application, work through this plain checklist. If you cannot confidently complete an item, pause and clarify it first.
-
My skin is healthy, intact, and free from irritation.
-
I have considered previous adhesive reactions and relevant health conditions.
-
I have completed the advised forearm tolerance check without a reaction.
-
I understand the purpose and the personally demonstrated pattern.
-
I know the correct position and tension.
-
I will leave the ends unstretched.
-
I can inspect the area and arrange help if needed.
-
I will remove immediately for itching or other adverse symptoms.
-
I understand that skin reactions override any planned wearing time.
-
I can soften the adhesive and peel it away slowly.
-
I will not use it as a cure or permission to exceed activity limits.
This checklist brings together the preparation, monitoring, and removal precautions above. Individual instructions still take priority where they set tighter limits.
Key points for using the tape safely
Kinesiology tape is an optional support tool, not a cure. Benefits vary, and the evidence does not justify broad promises. Use it alongside suitable rest and exercise, with individual guidance where needed.
Start with healthy skin and a forearm tolerance check. Remove it immediately if itching develops, and always peel it away gently. For a serious injury, consult a doctor instead of relying on another application. Safe use means knowing when to stop, not keeping it attached longer.
Explore more tapes and supports
Medical tape and bandages Crepe bandage Tapes and bands Orthopedic aids Pain relief and massage
Explore Medical Collections
All Categories
Abdominal Belt: Support After Surgery, in Pregnancy and After Delivery

Accessories
Accu-Chek Instant Strips: Use, Compatibility, Price & Blood Sugar Testing Guide
Accu-Chek Instant Strips: Uses, Features & Complete Guide

accupuncture

Acupuncture Needles & Supplies

Advanced Physiotherapy Machines & Lumbar Physiotherapy
AED Defibrillator: How It Works, Who Can Use It and Where to Place It

Airways
Alcohol Swab: Uses, Safe Use and Disposal Guide
Ambu Bag Full Form: Is There an Official Meaning?
Ambu Bag: Parts, Uses and Safety Guide
Ambu Full Form: What the Name Means and BVM Basics

Ambulance

Anatomy Models
You may also need
FOR YOURecommended for you
Save 25%