


Featured ChoiceSave 62%
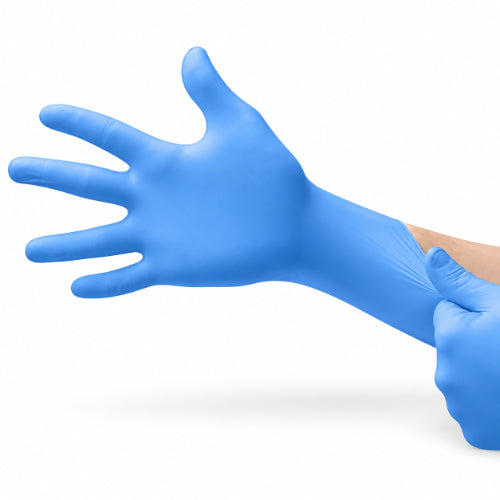


Nitrile Gloves: Choosing the Right Size and Taking Them Off Safely
Nitrile gloves: How to choose your size and remove them safely

Nitrile gloves should fit snugly without squeezing; remove them inside out, keeping their outer surfaces away from bare skin. Choose your size using the nitrile product’s chart, then check finger movement and comfort before use. This guide helps home users in India understand fit, labels, skin reactions, and careful removal. Seek advice from a doctor or trained professional before using them for medical care.
How do I choose the right size of nitrile gloves?
Pick your size from the specific nitrile product’s sizing chart, then confirm the fit while wearing fresh nitrile gloves. Your fingers should move freely without stretched material, painful pressure, or loose fingertips. A familiar size letter alone cannot confirm a suitable fit.
Start with clean, dry hands and a flexible measuring tape. Read the chart before measuring because different charts may request different measurements. Some use palm circumference, while others also consider hand length.
For palm circumference, wrap the tape around your hand’s widest part, excluding the thumb. Keep the tape level without pulling it tightly into your skin. Compare that measurement with the chart supplied for your chosen nitrile product.
If the chart requests hand length, follow its illustrated starting and finishing points. Do not substitute palm width for circumference or mix centimetres with inches. Record the measurement and its unit together to avoid confusion.
Use this simple measuring routine:
-
Read the nitrile product’s measurement instructions before choosing a size.
-
Keep your hand relaxed rather than forming a fist.
-
Measure the requested part without squeezing the tape.
-
Note the measurement and unit clearly.
-
Compare your measurement with that product’s chart.
-
Confirm comfort and movement with fresh nitrile gloves.
Avoid copying another family member’s size, even when your hands look similar. Instead, measure each person and keep their preferred fit information separately. A shared household can keep different sizes without sharing worn pairs.
Ask the seller for the nitrile product’s own chart when an online listing provides only size letters. Do not guess from a photograph of someone else’s hand. If the chart remains unclear, choose a nitrile product with clearer sizing information.

How to check glove fit at your fingers, palm and wrist
A useful fit check covers fingertips, finger spaces, palms, and wrists. Do not judge fit only by whether your hand enters the opening. The pair must also allow the movements your task requires.
Look at your fingertips first. Excess material can make small objects awkward to handle, while tight fingertips can restrict movement. Next, open your hand gently and bend your fingers without forcing them.
Use the table below as a practical fit check, not a replacement for the nitrile product’s chart.
Area to check |
A suitable fit |
Signs to reassess |
|---|---|---|
Fingertips |
Fingers reach comfortably without bunching |
Empty tips, pinching, or stretched material |
Finger spaces |
Material follows your hand comfortably |
Tight pulling between fingers |
Palm |
You can open and close your hand |
Restriction, stretching, or large loose folds |
Thumb |
You can move it naturally |
Pulling that limits movement |
Wrist |
Cuff stays comfortably in place |
Slipping, rolling, or painful pressure |
Simple handling |
You can control a small object |
Repeated slipping or awkward gripping |
These checks reflect the need for comfortable fit, movement, and control. Stop using a nitrile glove that feels restrictive or interferes with the task. Reassess sizing instead of forcing your hand to adapt.
For practice, use an empty, clean plastic container on a clear table. Try lifting it, setting it down, and gently touching your thumb to each fingertip. Treat this as a handling exercise, not a medical safety test.
Check both hands before starting. Describe any difficulty precisely when asking for help: tight palm, loose fingers, or slipping cuff. That description is more useful than simply saying the size feels wrong.

Signs that nitrile gloves are too tight or too loose
What happens if nitrile gloves are too small or too loose? Small nitrile gloves stretch under tension, while loose nitrile gloves can reduce handling control. Neither fit deserves acceptance simply because you can pull the pair onto your hands.
Too-small material can pull across your palm and between your fingers. You may notice resistance when spreading your fingers or closing your hand. Do not keep pulling harder to make the pair fit.
Too-large material can bunch around your fingers and interfere with fine movements. You may repeatedly adjust the fingertips or struggle to hold small items. Choose a better-fitting nitrile product rather than treating constant adjustment as normal.
Small tears also matter, even when the rest of the pair looks fine. A tiny opening means you should replace the damaged nitrile glove. Visual checks cannot identify every defect, so careful handling and hand hygiene remain necessary.
If you fall between sizes, compare the available fits before beginning care. Ask a trained professional for help when neither size allows comfortable movement. Do not choose painful tightness because it appears more secure.
Write down the problem rather than only changing the size letter. For example, note whether the palm fits while the fingers remain loose. Bring that information when requesting sizing advice.
Do not fold excess material around your fingers as a makeshift adjustment. Select a nitrile glove that lets you complete the task without repeated fixing. Keep sizing decisions separate from colour preferences or packaging appearance.

How do vinyl gloves compare with nitrile gloves?
Vinyl and nitrile are different synthetic materials, and neither contains natural rubber latex proteins as its base material. Nitrile suitability still depends on the specific nitrile product, fit, and intended task. Do not assume that all synthetic options perform alike.
For home users, the useful comparison starts with the task rather than a broad material ranking. Ask whether the nitrile product suits the care activity your clinician has described. Then check its fit and instructions.
A nitrile glove that feels comfortable still needs the correct intended use. Equally, a suitable label does not excuse loose fingers or restricted movement. Consider material, product instructions, and fit together.
What is the difference between nitrile gloves and latex gloves? Nitrile uses synthetic rubber; natural rubber latex contains proteins that can trigger latex allergy. This distinction matters when either the wearer or person receiving care has that allergy.
Avoid choosing nitrile only because someone calls it stronger, safer, or more professional. Such claims need details about the actual nitrile product and task. Colour, photographs, and broad material names cannot answer every suitability question.
When discussing a choice with a doctor, bring the actual packaging or a clear photograph. Ask which label information matters for your planned care. Explain any previous skin reaction before settling on a product.
A useful comparison note can include material, size, powder status, intended use, and any discomfort. Leave out guesses about performance that the instructions do not support. This keeps your choice grounded in information you can check.
Are nitrile gloves suitable for people with latex allergy?
Are nitrile gloves safe for people with latex allergy? They are a commonly recommended alternative because nitrile does not contain natural rubber latex proteins. However, that does not make every finished nitrile product completely latex-free or allergy-proof.
Vinyl also lacks these natural rubber latex proteins as a base material. Other ingredients can still cause reactions, and absolute absence claims can create false reassurance. No test guarantees that a finished nitrile product contains absolutely no latex allergens.
When searching for latex free gloves, look beyond the search phrase. Read the material statement and discuss a known allergy with your clinician. The FDA recommends wording such as “not made with natural rubber latex” rather than absolute absence claims.
What are the signs of a latex allergy from gloves? Symptoms can include itching, redness, hives, watery eyes, sneezing, coughing, or wheezing. Reactions can range from mild skin symptoms to a serious emergency.
Seek emergency medical help immediately for breathing difficulty, trouble swallowing, fainting, or rapidly worsening symptoms. Do not wait to see whether a serious reaction settles. Tell the responding professional about the suspected exposure.
For a less severe but repeated rash, stop using the suspected nitrile product and seek medical advice. Do not repeatedly expose yourself to check whether you react again. A clinician should assess the cause and advise on suitable alternatives.
Keep a simple record of the nitrile product used and the symptoms noticed. Include whether symptoms affected only your hands or other areas. Share that record during your appointment rather than attempting your own diagnosis.

Powder-free nitrile gloves: Why skin irritation is still possible
Why are powder-free nitrile gloves preferred? Avoiding added powder removes a source of exposure associated with irritation and allergic concerns. Powder-free does not mean that every wearer will tolerate every ingredient.
The concern becomes especially important with powdered natural rubber latex products. Latex proteins can attach to powder and become airborne during use or removal. Choosing nitrile avoids that natural rubber latex material, but skin reactions still deserve attention.
Look for a clear powder-free statement rather than judging the inside by touch. Do not add household powder to help your hands slide inside. If putting on nitrile gloves feels difficult, reassess dryness, size, and the nitrile product instructions.
Sweating, friction, and chemical additives can contribute to irritation during nitrile glove use. A rash does not automatically prove latex allergy or an allergy to nitrile itself. A professional assessment can help distinguish possible causes.
Tell your doctor if you already have sore, cracked, or repeatedly irritated skin. Describe which products you use for washing and when discomfort begins. Do not cover persistent symptoms with repeated nitrile glove use and hope they disappear.
Keep the distinction clear: powder-free describes one product feature, not a promise about your skin. Comfort also depends on fit, hand condition, and how you use the pair. Choose carefully and stop when symptoms suggest a problem.
What to check on glove labels before medical care at home
For medical care at home, ask a doctor or trained professional which product and technique your task requires. A material name alone cannot establish suitability. Bring the packaging when you need help interpreting the instructions.
Check the stated intended use, material, size, powder status, and single-use instructions. Read warnings rather than relying on a seller’s short product description. Ask for clarification when important information is missing or unclear.
Are nitrile examination gloves sterile? Many examination products are non-sterile, but some examination products carry sterile labelling. Read the actual label; the word “examination” alone does not settle the question.
Sterile products serve procedures requiring sterility, including surgery and certain other clinical tasks. Do not treat ordinary examination gloves as a substitute. Your clinician should decide what your home procedure requires.
Can industrial gloves be used for medical care at home? Do not choose an industrial-labelled product for body-fluid care merely because it contains nitrile. Use a nitrile product intended for the medical task, following professional advice.
Do not assume foreign regulatory wording answers every question about use in India. Ask your treating professional about the nitrile product you actually have. Avoid interpreting unfamiliar symbols without checking the supplied explanation.
Before an appointment, prepare three questions: which product, which steps, and when to change nitrile gloves. Ask the professional to demonstrate anything you find unclear. A written care plan can help different family members follow the same instructions.

Black vs blue nitrile gloves: Colour does not prove suitability
Why do some nitrile gloves come in black or blue? These are colour options, not a separate medical-use classification. Colour alone does not establish suitability, sterility, fit, or performance. Read the nitrile product’s stated purpose instead.
If two versions otherwise match, colour may be their only difference. However, two unrelated black and blue products may differ in many other ways. Do not assume matching material names mean matching specifications.
Compare the information that affects your task: intended use, size, warnings, and instructions. Leave colour until after those checks. A darker nitrile glove should not receive more trust simply because it looks substantial.
Likewise, blue does not automatically mean a nitrile product suits home medical care. Neither colour removes the need to inspect for damage or replace a torn nitrile glove. Those decisions depend on condition and use, not appearance.
If a family member prefers one colour, record that as a preference rather than a safety rule. Keep the original packaging available so anyone can verify the actual nitrile product. Avoid storing loose nitrile gloves in containers labelled only by colour.

Prepare your hands, supplies and workspace before putting on gloves
Plan the task before putting on nitrile gloves. Gather the items your care instructions require and identify where used materials will go. This reduces the need to interrupt care and search through cupboards.
Choose a clear area away from household clutter. Keep fresh supplies apart from used materials, and leave a clear route to handwashing. Follow any additional setup instructions from your visiting nurse or doctor.
Use this plain checklist before starting:
-
Confirm that the care task actually requires gloves.
-
Check the nitrile product’s intended use and your size.
-
Gather the items named in your care instructions.
-
Arrange the advised waste container within reach.
-
Remove hand jewellery that could interfere with use.
-
Keep nails clean and short.
-
Cover cuts as your clinician advises.
-
Wash and dry your hands before putting on the pair.
Consider common interruptions before you begin. Put your phone aside, explain that you need an uninterrupted space, and ask another adult for practical help. Keep pets and curious children away from the prepared area.
If you wear bangles or long sleeves, arrange them before washing your hands. Avoid adjusting clothing once you begin handling used materials. Ask your clinician how to keep clothing clear during the specific care task.
Do not take fresh nitrile gloves from the box using hands that have already handled soiled materials. Stop, remove the worn pair, and clean your hands first. Keep the supply area separate from the task’s used items.

How to put on nitrile gloves without tearing them
Wash your hands and dry them fully before putting on fresh nitrile gloves. Clean, dry hands support proper nitrile glove use. Do not skip this step because your hands will soon be covered.
Follow the nitrile product instructions and handle the pair gently. Inspect for visible damage before starting, then check again after putting them on. Replace a nitrile glove if you notice a tear or suspect a puncture.
Guide your fingers into position without pulling sharply at individual fingertips. If the material catches or feels unusually tight, pause rather than forcing it. Recheck the size and whether your hands are dry.
Avoid using jewellery, nails, teeth, or another sharp object to adjust the opening. Sharp objects can puncture the material. A nitrile glove that tears during fitting needs replacement before the task begins.
Complete your movement check before touching care materials. Open your hand, bend your fingers, and check that each cuff sits comfortably. Begin only when the pair allows the control your task requires.
For practice, ask a trained professional to watch your technique and describe what to change. You can also explain each step aloud while using unused practice nitrile gloves. Discard that pair after the exercise rather than saving it for care.
If repeated fitting attempts fail, stop and seek help with sizing or technique. Do not keep stretching the same pair until it finally goes on. A calmer setup and clearer instructions are more useful than greater force.

When to change nitrile gloves during care
A fresh-looking surface does not mean a used pair remains suitable for another task. Change nitrile gloves after completing the care activity and whenever they become damaged or contaminated. Clean your hands between changes.
Do not move from a soiled activity to a cleaner activity wearing the same pair. This applies even when helping the same person. Follow the sequence your clinician has demonstrated.
For example, a care plan may separate handling used materials from preparing clean supplies. Keep those activities distinct rather than carrying the same worn pair between them. Ask your nurse where each activity starts and finishes.
Avoid touching phones, cupboard handles, or other household objects during care. Worn surfaces can carry contamination onto items you touch. Limit unnecessary contact and remove the pair before returning to ordinary household activities.
If you notice a tear, stop the task safely and replace the pair. If exposure reaches broken skin, your eyes, or your mouth, seek prompt professional advice. Nitrile glove replacement alone does not address the exposure.
Ask your clinician about unexpected interruptions during the demonstration. Examples include a missing supply, a phone call, or someone entering the workspace. Agree on how to pause without turning a small interruption into rushed handling.
Keep replacement supplies accessible, but do not leave loose nitrile gloves scattered around the room. Use the original storage arrangement and take fresh nitrile gloves with clean hands. Plan changes as part of care, not as an afterthought.

How do I take nitrile gloves off safely?
Remove the first glove inside out using your still-covered hand. Then slide bare fingers beneath the remaining cuff and peel it over the first glove. Discard the nested pair and wash your hands immediately.
Treat the outside surfaces as contaminated, even when you cannot see dirt. Keep those surfaces away from bare skin and nearby household items. Work slowly enough to control the peeling movement.
Follow these steps:
-
Pinch the outside near one wrist. Use the opposite gloved hand without catching your bare skin.
-
Peel the first glove away. Turn it inside out as it comes off your hand.
-
Hold the removed glove. Keep it in the palm of your still-gloved hand.
-
Slide bare fingers under the remaining cuff. Touch its inner surface rather than its outside.
-
Peel the second glove over the first. Turn it inside out, enclosing the removed glove.
-
Discard the nested pair. Use the waste route advised for the care task.
-
Wash your hands immediately. Do this before touching your phone, face, or clean supplies.

The important difference lies between the first and second movements. A covered hand touches the first outer surface; bare fingers then move beneath the remaining cuff. Do not repeat the outside pinch with your bare hand.
Keep the removed pair in your hand only until you place it in the advised container. Do not put it on a table while finishing another activity. Complete removal and handwashing before moving on.
Practise this sequence with unused nitrile gloves while someone reads the steps aloud. Ask a visiting nurse to check the position of your bare fingers. Focus on keeping those fingers away from the outer surface.
Do not rush to make the technique look smooth. Correct contact points matter more than speed. Once you understand the sequence, keep using the same careful order rather than improvising.
Common mistakes when removing nitrile gloves
Pulling from the fingertips can bring your bare fingers into contact with the outside surface. Instead, use the wrist-based method described above. Keep the distinction between inner and outer surfaces clear throughout removal.
Do not snap the cuff, shake the removed pair, or bring it near your face. Keep your hands controlled and away from clothing. Treat removal as part of the care task rather than an untidy final step.
If you accidentally touch an outer surface, clean your hands promptly. Do not rub your eyes or reach for your phone first. Follow your care professional’s advice if body fluids contacted your skin.
A tight cuff can make removal feel awkward. Ask your clinician to demonstrate the finger position using the nitrile product you actually wear. Do not use scissors or another sharp tool to cut it away yourself.
Tell the professional if pain, reduced grip, or limited movement makes the method difficult. Ask whether another caregiver should assist with the task. The plan should match your abilities rather than assume everyone can perform identical movements.
Use a practice session to identify the exact difficulty. For example, explain whether you struggle to pinch the cuff or slide fingers beneath it. Specific feedback helps the professional demonstrate a useful adjustment.

Why handwashing is still needed after removing gloves
Do I still need to wash my hands after removing nitrile gloves? Yes: hand hygiene remains necessary because small defects and removal can leave your hands contaminated. A covered hand is not a substitute for a clean hand.
For a straightforward home routine, wash with soap and water after removal. Follow your clinician’s instructions if your care plan includes an alcohol-based hand rub. Use soap and water when your hands look visibly dirty.
Cover your palms, hand backs, fingers, fingertips, thumbs, and spaces between fingers. Rinse thoroughly and dry with a clean towel or appropriate disposable towel. Do not leave soap trapped around your fingers.
Wash before starting as well as after finishing. Clean your hands between nitrile glove changes when moving between tasks. Repeatedly replacing nitrile gloves without hand hygiene misses an important part of the routine.
If frequent washing causes soreness, ask a healthcare professional about suitable skin care. Report cracks or persistent irritation rather than ignoring them. Do not solve discomfort by skipping necessary hand hygiene.
Arrange soap, water access, and drying materials before beginning care. Check that another household member has not moved what you need. A ready washing area makes the final step easier to complete without interruptions.
Teach everyone helping with care the same finishing sequence: remove, discard, wash, dry. Keep that order consistent when responsibilities change between relatives. Ask your visiting nurse to correct any uncertainty during a demonstration.
Never wash or reuse disposable nitrile gloves
Can disposable nitrile gloves be washed and reused? No: disposable products are single-use items, including nitrile examination gloves. Do not wash, disinfect, or save them for another care task.
Rinsing visible dirt away does not turn a used pair into fresh nitrile gloves. Washing or applying hand rub can affect the material’s integrity. Replace the pair instead of trying to clean its outer surface.
Do not hang a used pair near the sink, turn it back outside out, or store it in a drawer. Do not share worn pairs between family members. Single use applies regardless of whether the pair still looks intact.
Likewise, removing a nitrile glove briefly does not make it suitable for putting on again. Discard it, clean your hands, and use fresh nitrile gloves when needed. Follow the care plan when deciding whether the next task requires one.
Make this rule clear to anyone who helps at home. Keep used materials away from fresh supplies so nobody mistakes one for the other. Avoid leaving an inside-out pair beside its original box.
If you lack suitable fresh nitrile gloves, contact your care professional about the next step. Do not improvise by washing a used pair or substituting an unsuitable nitrile product. Ask how to pause or rearrange the task safely.

How to store unused nitrile gloves and dispose of used pairs
Keep unused nitrile gloves in their original packaging in a clean, dry place. Protect them from direct sunlight, heat, liquids, and chemicals. Follow the storage information supplied with the nitrile product.
Avoid carrying loose nitrile gloves in pockets or placing them beside used care materials. Take fresh nitrile gloves with clean hands when you need them. Keep the opening and surrounding storage area clear of spills.
For an Indian home, ask your visiting nurse or local care provider about the correct waste route. Disposal depends on the care task and contamination involved. Do not assume every used pair belongs in the same household waste stream.
Before starting care, confirm where the used pair will go. Ask whether you need a particular container or collection arrangement. Keep the agreed container accessible without placing it among clean supplies.
Do not copy a disposal rule from an unrelated overseas video without checking local advice. Bring the question into your home-care discussion. Explain whether you receive regular professional visits or manage the task between visits.
Keep product instructions available rather than throwing the packaging away immediately. Record the size that fits each caregiver and any reported discomfort. That information can support clearer conversations when choosing the next pack.

Nitrile glove checklist: Fit, use, removal and handwashing
A useful household routine connects selection, preparation, use, removal, and handwashing. Keep each stage clear rather than focusing only on the material. Ask a doctor or trained professional to review the complete sequence for medical care.
Use this final checklist when discussing the routine:
-
Choose a nitrile product intended for the task.
-
Match your measurement to its sizing chart.
-
Confirm comfortable fingers, palms, thumbs, and cuffs.
-
Check for visible damage before starting.
-
Follow the clinician’s instructions about changing nitrile gloves.
-
Peel the pair off without touching its outside with bare fingers.
-
Discard it through the advised waste route.
-
Wash and dry your hands immediately afterward.
-
Never wash, share, or reuse a worn pair.
If several relatives provide care, let each person practise rather than only watch. Ask everyone to explain when they would stop and change nitrile gloves. Use the same written care instructions, while allowing different sizes for different hands.
The takeaway is straightforward: choose a comfortable fit, respect the nitrile product’s limits, and learn careful removal. Nitrile does not remove the need for handwashing or professional guidance. When fit, skin symptoms, or care instructions remain unclear, pause and ask for help.
Explore Medical Collections
All Categories
Abdominal & Maternity Support

Accessories

Accu-Chek Instant Strips: Use, Compatibility, Price & Blood Sugar Testing Guide
Accu-Chek Instant Strips: Uses, Features & Complete Guide

accupuncture

Acupuncture Needles & Supplies

Advanced Physiotherapy Machines & Lumbar Physiotherapy

Airways
Alcohol Swab: Uses, Safe Use and Disposal Guide
Ambu Bag Full Form: Is There an Official Meaning?
Ambu Bag: Parts, Uses and Safety Guide
Ambu Full Form: What the Name Means and BVM Basics

Ambulance

Anatomy Models
Anesthesia Machine
You may also need
FOR YOURecommended for you
Save 62%