


Empty collection
This collection does not contain any products.
Retractor for Students: Types, Uses & How to Choose
Retractor for Students: Types, Uses & How to Choose
Retractor knowledge is a learning essential for students who need to recognise common surgical retractor names, shapes, sizes, and care requirements. This guide explains the main types in plain language, including the doyen retractor, langenbeck retractor, army navy retractor, and self retaining retractor, without giving any procedure instructions for use on people. You will learn how to compare designs, understand stainless steel quality, clean one safely, and store it so it stays in good condition.
What is a retractor used for?
A retractor is used to hold tissue or an opening aside so a trained clinical team can see and access a working area more clearly. For students and trainees, the main goal is usually not to learn a procedure from the tool alone, but to identify it, understand its shape, describe its purpose, and know how to care for it correctly.
In learning settings, a surgical retractor helps you connect a name with a physical design. You may be asked to recognise a flat blade, a curved blade, a right-angled end, a broad handle, or a locking frame. These features are not random. Each design is made to provide a certain kind of holding, spacing, or exposure in professional surgical environments.
It is also useful to understand that “retractor” is a broad word. Some are simple handheld pieces. Others are self retaining, which means they can stay open through a locking or spreading mechanism. Some are narrow and delicate-looking. Others are broad, deep, or strongly curved. The differences matter because students are often tested on name recognition, basic function, and safe handling.
The basic idea behind retractor design
Most retractors are made around a simple idea: a handle or frame gives control, while a blade, lip, hook, or curved end does the holding. The shape of that working end tells you a lot about the instrument. A shallow, flat end is different from a deep curved one. A right-angled blade is different from a smooth, flexible-looking curve.

When you look at a retractor as a student, try to break it into visible parts rather than memorising the whole item at once. Notice the handle first. Is it straight, flat, looped, or part of a larger frame? Then look at the blade. Is it wide or narrow? Is it curved, angled, double-ended, or spoon-like? Finally, look for any special feature, such as a ratchet, screw, hinge, or locking arm.
This habit makes instrument identification much easier. Instead of guessing, you start describing what you see. For example, an army navy retractor is often recognised by its double-ended shape and right-angled blades. A langenbeck retractor is usually recognised by its handle and single right-angled blade. A doyen retractor is known for its broad, smooth, curved blade.
What are the types of surgical retractors?
The main types of surgical retractors can be grouped by how they are held, how they open, and what shape their blades have. For student learning, the easiest starting point is to separate them into handheld types, self retaining types, and types with special curved or angled blade shapes.
Handheld retractors
A handheld retractor is a simple type held by a trained person during professional use. Students usually study these because the shapes are easy to see and compare. Many common teaching examples fall into this group, including the langenbeck, army navy, and doyen designs.
The advantage of handheld designs, such as the doyen and langenbeck, is that they are usually simple to identify. They often have a handle and one or two blades. There may be no screws, locks, or moving parts. For beginners, this makes them useful for learning basic terms such as blade, handle, lip, curve, depth, and width.
Handheld ones vary widely in size and shape. Some are slim and light. Others are broad and heavy. Some have short blades, while others have deep ones. These differences are important when describing them in exams, product listings, or study notes.
Self retaining retractors
A self retaining retractor is designed with a mechanism that helps it stay open or hold its position. It may have arms, hinges, ratchets, screws, or a frame-like shape. The key idea is that it does not rely only on a person holding a handle in place.
For students, the most important point is recognition. A self retaining retractor usually looks more mechanical than a simple handheld one. It may open and close like a spreading frame, and it may have a locking section that controls the distance between the blades. You should be able to describe it as an instrument with a built-in holding mechanism.
Because self retaining designs have moving parts, cleaning and storage need extra attention. Hinges and ratchets can trap moisture or debris if not cared for properly. When buying one for study or training, check that the movement feels smooth and that the locking parts align cleanly.
Single-ended retractors
A single-ended retractor has one working end and one handle end. The langenbeck is a common example students learn early. This layout is simple, which makes it easy to identify and sketch in notes.
Single-ended ones can have different blade lengths and widths. Some blades are short and shallow. Others are longer or deeper. The blade may be angled sharply from the handle, or it may curve more gradually.
When comparing single-ended retractors, pay attention to the angle and blade profile. A right-angled blade gives a different visual identity from a long, smooth curve. This is one reason students often learn the langenbeck and doyen as separate examples rather than treating all retractors as the same.
Double-ended retractors
A double-ended retractor has a working end on both sides. The army navy retractor is a well-known example. Each end of the army navy may be a different size, which makes the army navy useful to recognise in teaching sets.
For students, the key clue is balance. Instead of one handle and one blade, the army navy works like a single piece with two blade ends. One end of the army navy may be larger, longer, or deeper than the other. This gives you two visible profiles to compare.
Double-ended shapes such as the army navy are common in student identification exercises because they stand out. The army navy retractor, in particular, is often remembered by its flat middle section and two right-angled ends. The army navy is a good example of how a simple outline can help you remember an instrument name.
Common retractors students should know
There are many retractors, but students often start with a smaller set of common names. Learning these first gives you a strong base before you move on to less familiar patterns. The goal is not to memorise every model at once, but to understand the features that make each one recognisable.

Doyen retractor
A doyen retractor is usually known for its broad, smooth, curved blade. The doyen curve often looks gentle and sweeping rather than sharply angled. This makes the doyen visually different from a right-angled design such as the langenbeck.
Students often describe the doyen by its curve first. The doyen may look wide, rounded, and deep enough to support broad retraction in professional settings. The doyen handle is usually simple, so the curve becomes the main feature to remember.
When buying a doyen retractor for study, check that the curved end is smooth and evenly finished. There should be no rough edges, sharp burrs, or uneven polishing. A clean doyen finish helps with safe handling, easier cleaning, and clear visual identification.
Langenbeck retractor
A langenbeck retractor is commonly recognised by its handle and right-angled blade. The langenbeck blade is usually narrower than a doyen-style curve and has a more direct bend from the handle. This clear angle makes the langenbeck a standard item for students learning instrument names.
The langenbeck retractor may come in different sizes. Some langenbeck versions have a small blade for shallow use in professional settings, while others have longer or wider blades. For learners, the important langenbeck features are the straight handle, the single blade, and the angled end.
If you are comparing several retractors on a tray or in a study kit, the Langenbeck shape is often one of the easiest to separate from broad curved designs. Look for the simple langenbeck handle plus right-angled blade combination. That langenbeck shape is the memory hook.
Army navy retractor
An army navy retractor is a double-ended handheld type. An army navy usually has two right-angled ends, often with different sizes. The army navy middle section works as the grip area, while either end shows a flat, bent blade.
Students often find the army navy easy to remember because the name is unusual and the shape is distinctive. Unlike the Langenbeck, the army navy does not have one obvious handle and one obvious blade. Instead, both ends are functional in design, making the overall shape symmetrical or nearly symmetrical in feel.
When choosing an army navy retractor for learning, check the thickness and finish. A good student-quality army navy should feel solid, not flimsy. The corners should be cleanly finished, and both ends of the army navy should be smooth enough for repeated handling during study.
Self retaining retractor examples
Self retaining retractors are a category rather than one single shape. Their main feature is a built-in mechanism that helps them hold an open position. Students should look for frames, arms, ratchets, screws, or locking parts.
These designs can look more complex at first, but they become easier to understand when you focus on the mechanism. Ask yourself: does this one simply have a handle and blade, or does it include a way to stay open by itself? If it has a holding or locking feature, it likely belongs in the self retaining group.
For buying and care, moving parts matter. Open and close the mechanism only as intended by the product design, and check that the parts move smoothly. Avoid forcing locks or hinges, because bent parts can make the tool harder to clean, store, and identify accurately.
What is the difference between a Doyen and a Langenbeck retractor?
The difference between a Doyen and a Langenbeck retractor is mainly the blade shape: a doyen retractor has a broad, smooth, curved blade, while a langenbeck retractor usually has a narrower blade set at a right angle to the handle. In simple student terms, Doyen looks broad and curved; Langenbeck looks more angular and direct.

This doyen and langenbeck difference is useful because both are common learning names. If you mix them up, focus on the blade before the handle. The Doyen blade often looks like it sweeps outward in a wide curve. The Langenbeck blade looks more like a bent end connected to a straight handle.
Here is a simple comparison for quick revision:
| Feature | Doyen retractor | Langenbeck retractor |
|---|---|---|
| Main visual clue | Broad curved blade | Right-angled blade |
| General shape | Smooth, sweeping curve | Straight handle with angled end |
| Student memory tip | “Doyen = deep, broad curve” | “Langenbeck = L-shaped bend” |
| Common learning focus | Shape and width of blade | Angle and single-ended design |
| Buying check | Smooth curve, even polish | Clean angle, firm handle |
This comparison is not meant to teach clinical technique. It is a safe way to learn recognition, naming, and product selection. Once you can describe the visible differences, the names become much easier to remember.
Shapes and blade features to recognise
Retractor shapes can look confusing at first, but most fit into a few simple patterns. Once you learn those patterns, you can describe a new one even if you do not know its name yet. This is especially useful for students who are preparing for practical identification tests.
Flat blades
Flat blades look straight or only slightly shaped. They may be broad or narrow, and they often have a simple surface. The army navy retractor is a good example where flat, angled blade ends are important for recognition.
These are easy to clean visually because the surface is open and simple. However, corners and bends still need attention during cleaning. Students should learn to inspect the edges and the inside of any angle, not just the large flat surface.
Curved blades
Curved blades sweep outward or inward rather than forming a sharp angle. The doyen retractor is a strong example of a broad curved style. Curves may be shallow, deep, narrow, or wide.
A curved doyen blade can make the whole piece look more rounded and smooth. In identification, this often separates it from an angular design. When studying, trace the outline with your eyes and ask whether the shape is a curve or a bend.
Right-angled blades
Right-angled blades bend sharply from the handle or body of the instrument. The langenbeck and army navy retractors are useful examples for students. This shape is often easy to spot because it looks like a clear corner.
The angle is one of the most important features to inspect when buying or caring for this type of tool. A clean angle should look even and well finished. Rough inner corners can hold residue and may be harder to clean properly.
Lips, rims, and rounded edges
Some retractors have a small lip, rim, or rounded end. These details can help the blade hold position in professional settings, but for students they are mainly identification clues. A lip may make the end look hooked, raised, or slightly curved back.
Always check these small features when comparing them. Two designs may look similar from far away but differ at the tip. Good product photos or hands-on study should show the blade end clearly.
Sizes and dimensions matter for students
Retractors come in different sizes, and size affects both identification and buying decisions. A student does not need every possible size, but it helps to understand what common size differences mean. The same named retractor, such as a doyen or army navy, may be available in several lengths, blade widths, or blade depths.

Length is the overall measurement from one end to the other. Blade width describes how broad the working end is. Blade depth or blade length describes how far it extends from the bend or handle. These terms are helpful when comparing product descriptions.
A smaller one may be easier to carry, store, and use for basic name recognition. A larger one may make blade shape easier to see in class. If your course gives a list, follow it first. If not, choose common student sizes that clearly show the main shape without being too large for storage.
Use this checklist when reading a product listing:
- Overall length: Is it compact enough for your study space or storage case?
- Blade width: Is it wide enough to clearly show the shape you need to learn?
- Blade depth: Does the product description explain how deep or long it is?
- Single or double ended: Does the design match the name you are trying to study?
- Moving parts: If it is a self retaining retractor, are the hinge and lock described clearly?
- Finish: Does the listing mention stainless steel and a smooth polished surface?
- Quantity: Are you buying one piece or a set of retractors with different shapes?
Do not choose only by price or appearance. A very cheap one with unclear size information may not match what you need for study. A clear description is often more useful than a vague listing with a shiny photo.
Stainless steel quality and finish
Most student retractors are made from stainless steel because it is strong, clean-looking, and resistant to rust when cared for properly. Stainless steel does not mean “no care needed.” It still needs correct cleaning, drying, and storage to protect the surface.
When a listing mentions stainless steel, look for signs of quality rather than relying on the words alone. A good stainless steel retractor should have smooth edges, even polishing, and a stable shape. It should not have rough seams, flaking, deep scratches, or dark spots on arrival.
How do you choose a stainless steel retractor?
You choose a stainless steel retractor by checking the steel quality, finish, shape accuracy, size, and suitability for your learning goal. For students, the best choice is usually a clearly labelled one that matches your course needs, has a smooth polished surface, and is easy to clean and store.
Here are the main points to check before buying:
- Confirm the retractor name. Make sure the product is labelled as the type you need, such as doyen, langenbeck, army navy, or self retaining retractor.
- Check the shape in the photos. The blade should match the expected shape for that type. If the image is unclear, avoid guessing.
- Read the size details. Look for overall length and blade measurements. A name alone is not enough because many retractors come in different sizes.
- Look for stainless steel information. The listing should state stainless steel clearly. If it mentions a grade, that can help, but the finish and care instructions still matter.
- Inspect the polish. A smooth polish is easier to clean and safer to handle. Avoid items that look rough, pitted, or poorly finished.
- Check moving parts. For a self retaining retractor, the lock or hinge should be described as functional and smooth.
- Consider storage. Choose a size that fits your storage tray, pouch, or drawer without bending or rubbing against other instruments.
Students sometimes focus only on the name, but the same named retractor can vary by maker. The safest approach is to match the name, shape, size, and finish together. If all four make sense, you are more likely to buy one that supports your learning.
Cleaning and care for retractors
Cleaning is part of responsible ownership. Even if an instrument is used only for study, it can collect dust, fingerprints, moisture, or residue from handling. Regular cleaning keeps the metal easier to inspect and helps prevent staining.
If your question is “How do you clean a retractor?”, the simple answer is: follow the maker’s care instructions, wash away visible soil with a suitable mild cleaner, rinse well, dry completely, and store it in a clean, dry place. Do not use harsh methods unless the product instructions say they are safe for that specific instrument.
For student-owned retractors, the aim is usually basic cleanliness and surface protection. Do not treat every piece the same if it has different finishes or moving parts. A self retaining retractor needs more attention around hinges and locking areas than a simple flat handheld one.
A simple student cleaning routine
Use this routine as a general care guide for study retractors, not as a clinical processing protocol:
- Read the product instructions first. The maker may give specific cleaning limits or warnings.
- Remove visible dust or residue. Use a soft cloth or suitable brush for simple surface cleaning.
- Wash with mild cleaning solution if appropriate. Avoid harsh chemicals unless the manufacturer allows them.
- Rinse thoroughly. Cleaner left on the surface may cause marks or dullness.
- Dry completely. Moisture left in corners, hinges, or blade bends can encourage staining.
- Check the surface. Look for spots, rough areas, cracks, or loose parts.
- Store only when dry. A damp piece should not be closed into a pouch or box.
The most common student mistake is putting a damp stainless steel retractor away too quickly. Stainless steel resists rust, but trapped moisture can still cause staining or surface problems. Drying is not optional; it is one of the most important care habits.
Cleaning self retaining retractors
A self retaining retractor needs extra attention because of its moving parts. Hinges, ratchets, screws, and joints can trap moisture. If these areas are ignored, it may become stiff or harder to inspect.
Open the mechanism only as far as the design allows and do not force it. Clean around the joints gently, then dry the areas carefully. If the product instructions allow lubrication for moving parts, use only what they recommend. Do not add random oils or sprays because they may leave residue or damage the finish.
After cleaning, check that the mechanism still moves smoothly. If it catches, sticks, or does not align, stop using it for study demonstrations until it is inspected or replaced. A damaged self retaining retractor can give students the wrong idea about how the design is supposed to look and move.
Storage methods that protect retractors
Good storage keeps retractors clean, dry, and easy to identify. It also protects the shape. Even a strong stainless steel piece can be scratched, bent, or dulled if it is thrown into a crowded drawer.

The best storage method depends on how many retractors you own. A single langenbeck may fit in a simple pouch. A small group, such as a doyen, langenbeck, and army navy, may need a divided tray or labelled storage box. Larger or self retaining pieces need enough space so their arms or blades are not under pressure.
Use these storage habits:
- Store retractors dry. Moisture is one of the biggest causes of staining.
- Keep similar items grouped. Put handheld ones together and self retaining ones in a space that protects their mechanisms.
- Use labels. Labelling helps students connect the name with the shape each time they revise.
- Avoid overcrowding. Crowding can scratch polished stainless steel and hide damage.
- Protect blade edges and tips. Do not let narrow ends press hard against metal surfaces.
- Keep storage clean. A dirty pouch or box can transfer dust and marks back onto clean tools.
- Check regularly. A quick inspection helps you catch stains, stiffness, or rough spots early.
Storage is also a learning tool. If each one has a labelled place, revision becomes easier. You see the name, shape, and size together every time you open the case.
How to study retractor names without confusion
Retractor names can feel difficult because many designs are made from the same material and have a similar polished look. The trick is to study by shape, not by shine. Stainless steel surfaces can distract you, but outlines are easier to remember.
Start with a small group: doyen, langenbeck, army navy, and one self retaining retractor. Learn what makes the doyen, langenbeck, and army navy different. Then add more examples later if your course requires them.
A helpful study method is to use a four-part description:
- Name: What is it called?
- Type: Is it handheld or self retaining?
- Shape: Is the blade curved, flat, right-angled, broad, narrow, single-ended, or double-ended?
- Care point: Does it have any part that needs special cleaning or storage attention?
For example, you might describe a Langenbeck as a handheld, single-ended retractor with a right-angled blade. You might describe an army navy as a handheld, double-ended piece with flat right-angled ends. You might describe a Doyen as a handheld type with a broad curved blade.
This style of description is simple, but it works well. It helps you move from memorising names to understanding features. It also prepares you to compare retractors you have not seen before.
Choosing a retractor for a student or trainee
When buying a retractor as a student, your needs are different from a hospital buyer’s needs. You are usually looking for clear identification, safe handling, durable material, and easy care. You do not need to buy the most complex option if your goal is basic learning.
A good student retractor should be clearly named, properly shaped, and made from decent stainless steel. It should be easy to clean and store. It should also match the level of your course, because buying advanced or oversized items may create confusion rather than confidence.
Before you buy, ask yourself:
- What name do I need to learn? Choose the exact type required, such as doyen or langenbeck.
- Do I need one item or a small set? A set may be useful if you are comparing shapes.
- Is the size suitable for my study space? Large ones may be harder to store.
- Is the design easy to identify? Clear shape matters more than decorative shine.
- Is it stainless steel? Stainless steel is a common, practical choice for study retractors.
- Can I clean it easily? Simple shapes are easier to care for; moving parts need more attention.
- Can I store it safely? Avoid buying items that will not fit your case, tray, or drawer.
If you are unsure, choose the one that best matches your course list or teacher’s terminology. Names can vary slightly across suppliers, so shape confirmation is important. A product photo and size details should support the name, not replace it.
Common buying mistakes to avoid
Many students buy retractors quickly because the names look familiar. This can lead to the wrong size, wrong shape, or poor-quality finish. A few careful checks before purchase can save money and frustration.
Mistake 1: Buying by name only
A name is important, but it is not enough. One listing may say “retractor” without explaining whether it is a doyen, langenbeck, army navy, or self retaining retractor. For learning, a vague name is not very helpful.
Always match the name to the shape, whether doyen, langenbeck, or army navy. If a product says Langenbeck, look for the right-angled blade. For Doyen, look for the broad curved blade. If it says army navy, look for the double-ended design.
Mistake 2: Ignoring size
Two items with the same name can look different because they are different sizes. A blade that is too small may be hard to study from a photo or in a group setting. A tool that is too large may be difficult to store.
Check the measurements before buying. Overall length and blade dimensions are especially useful. If the seller does not provide basic size details, consider whether another listing would be easier to trust.
Mistake 3: Overlooking finish quality
A shiny photo does not always mean a good finish. Look for smooth edges, even polish, and clean bends. Poor finishing can make cleaning harder and may make the tool uncomfortable to handle during study.
When your retractor arrives, inspect it before storing it. Check the blade edge, corners, inner angles, and any moving parts. If something looks rough, cracked, loose, or stained, deal with the issue right away according to the seller’s return or support process.
Mistake 4: Forgetting care and storage
Some students buy an instrument and leave it loose in a drawer. This can lead to scratches, dust, or moisture marks. A simple pouch, labelled box, or divided tray can make a big difference.
Care does not need to be complicated. Clean it when needed, dry it fully, and store it safely. These habits protect your purchase and make revision easier.
Quick revision guide for common retractor names
Use this section as a fast review after reading the full guide. It is not a complete catalogue, but it covers the core names many students meet early.
| Retractor | Type | Main shape clue | Student care note |
|---|---|---|---|
| Doyen | Handheld | Broad, smooth, curved blade | Dry the curve and inspect the polished surface |
| Langenbeck | Handheld | Single right-angled blade with handle | Check the inner angle for residue or roughness |
| Army navy | Handheld | Double-ended, flat right-angled blades | Protect both ends during storage |
| Self retaining | Mechanism-based | Arms, frame, ratchet, screw, or lock | Clean and dry hinges and locking areas carefully |
For exam revision, cover the names and try to identify each design from the shape clue alone. Then cover the shape clue and try to describe it from memory. This active recall method helps names stay in your mind better than rereading alone.
Practical checklist before you buy
A retractor for student learning should be simple to identify, well finished, and easy to maintain. Use this final checklist before adding one to your basket:
- The retractor name is clear and matches your course needs.
- Photos show the blade shape from a useful angle.
- The listing states the size, not just the name.
- Material is stainless steel or another clearly described suitable material.
- The surface looks smooth, polished, and free from obvious defects.
- The blade shape matches the type: curved for Doyen, right-angled for Langenbeck, double-ended for army navy.
- A self retaining retractor has a clear mechanism and enough product detail.
- You have a clean, dry place to store it.
- You understand the basic cleaning instructions.
- The item supports your learning goal without adding unnecessary complexity.
This checklist is especially helpful for online shopping, where you cannot hold the item before buying. Clear photos, clear measurements, and clear names reduce the chance of confusion.
Final takeaway
A retractor is more than a metal item to memorise; it is a shape, a name, a type, and a care responsibility. Students should focus on recognising the main categories, especially handheld and self retaining retractors, then learn common examples such as the doyen, langenbeck, and army navy retractors.
When choosing a surgical retractor for study, look for the right name, clear shape, suitable size, good stainless steel quality, smooth finish, and easy cleaning. Store it dry, protect the blade, and keep similar pieces labelled. With those habits, you can build confidence in identification while keeping your learning tools in good condition.
Explore Medical Collections
All Categories
Abdominal & Maternity Support

Accessories

Accu-Chek Instant Strips: Use, Compatibility, Price & Blood Sugar Testing Guide
Accu-Chek Instant Strips: Uses, Features & Complete Guide

accupuncture

Acupuncture Needles & Supplies

Advanced Physiotherapy Machines & Lumbar Physiotherapy

Airways

Ambulance

Anatomy Models
Anesthesia Machine

Anesthesia Products
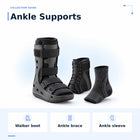
Ankle Support for Home Use: Braces, Sleeves & Walker Boots
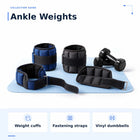
Ankle Weights & Exercise Weights for Home & Rehab

Anti-Bedsore Air Mattresses